I have been using freedns as ddns before, which is actually quite convenient. Freedns has a free interface for updating dns, which can be updated directly using curl.
curl http://sync.afraid.org/u/*******, but certificate renewal is more troublesome. Although it can be achieved using acme.sh, it is not so suitable to implement it because freedns does not have a standard interface. In addition, freedns always gives the secondary domain name to others, so I gritted my teeth and simply migrated the domain name to cloudflare for management.
1. Implement DDNS
It is actually a little more troublesome to implement ddns with cloudflare than freedns. You also need to write a sh file, but it is not like freedns that can be done in one sentence. You need to call the standard interface. I actually recommend putting it on the router, because my Synology actually hangs a proxy all year round. I don’t know why. After the system proxy, you can find the real ip by going to ip138, but using the script to get the ip always gets the proxy ip, so putting it on the router is the best choice. Of course, if you still want to use Synology’s scheduled tasks, then put the script somewhere in Synology, and then use the scheduled tasks. Just use bash to execute the sh file.
Before writing the script, first take the following 4 values: API_TOKEN, ZONE_ID, RECORD_ID, RECORD_NAME
1.1. Take four parameters
1.1.1. API_TOKEN
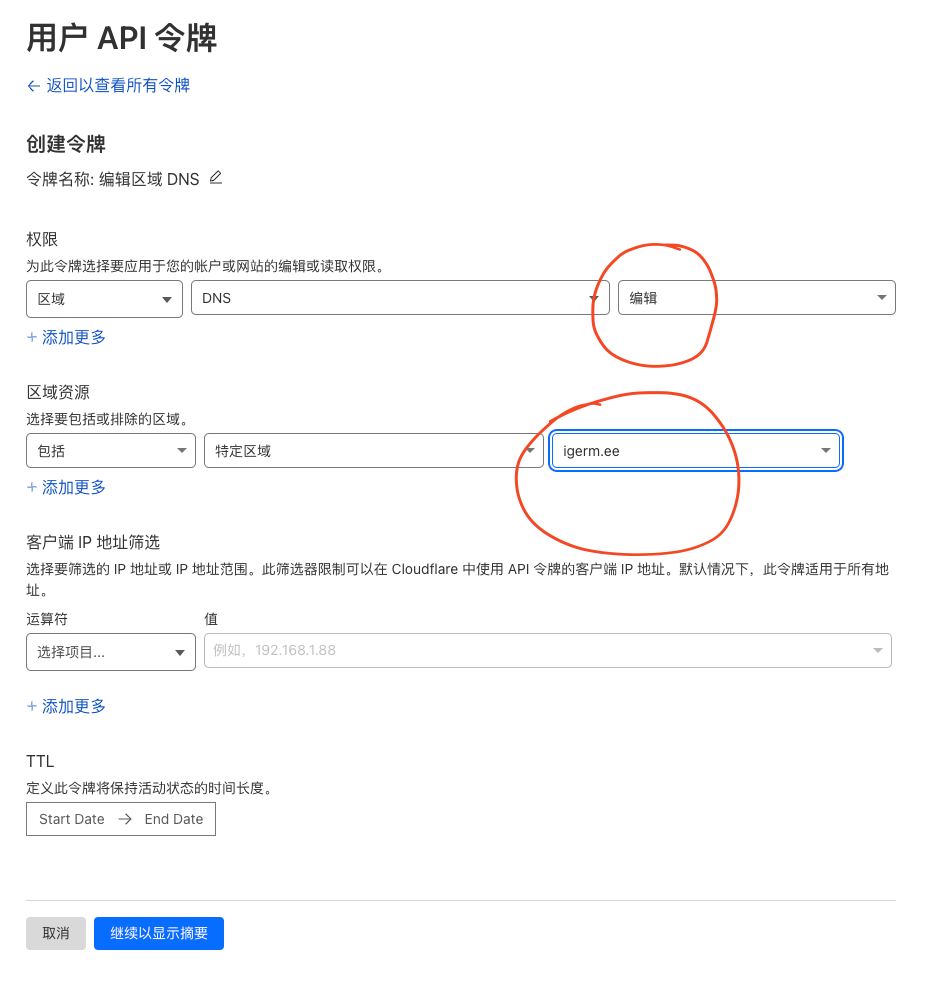
First, create a DNS token in the user profile
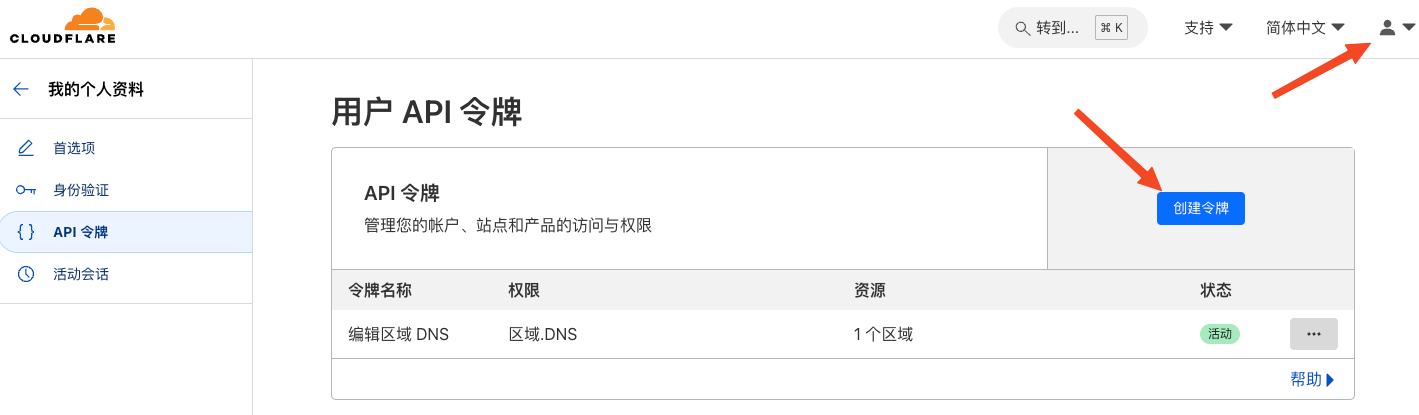
Select Edit Permissions and save it. This token is saved and only displayed once.
1.1.2. Cloudflare Zone ID
This can be found in the lower right corner of the website overview. The Zone ID is usually a 32-bit hexadecimal string, for example:0123456789abcdef0123456789abcdef
1.1.3. DNS record ID (record ID that needs to be updated)
This can be checked using developer tools, but it is easier to check using the API
1 | curl -X GET "https://api.cloudflare.com/client/v4/zones/<你的Zone ID>/dns_records?name=<你的RECORD_NAME>" \ |
Simply replace Zone ID, Email, Token and RECORD_NAME to find the DNS record ID
1.1.4. RECORD_NAME
This is the domain name of the IP you want to update. It can be the root domain name or the subdomain name. Anyway, it is the one you want to update the A record
1.2. Write the script
After getting the above four values, you can write the script. SSH into the router, get root privileges, and then choose a location. I saved it in /usr. Use vi ddns.sh directly, open the editor, press I to enter the edit mode, copy the following script into it, and remember to replace the four values
The script is as follows:
1 |
|
**PS: **If the script you copied from other places cannot run on Xiaomi router, or Xiaomi router does not return value when using curl to access https address, remember to add the -k parameter after curl
1.3. Scheduled tasks
After writing the script, just add a scheduled task to crontab -e
*/10 * * * * /usr/ddns.sh
Execute every 10 minutes. If your dynamic IP is updated once a week, you can adjust the scheduled task as appropriate
2. Use acme.sh to automatically update the certificate for Synology
It is recommended to install acme.sh directly on Synology without using docker, which can greatly simplify the verification process when renewing the certificate.
First open the SSH port, and then log in to Synology with any tool. I use Termius, which I think is a good app for Mac.
1 | sudo su |
Just enter the values line by line, and then get the Account_ID and Token. You can use the same Token as above, because it is definitely the same. Then the Account_ID is on the same page as the Zone ID. With these two values, continue with the following operations.
1 | export CF_Account_ID="*****************" |
Normally, the certificate has been obtained here. Next, deploy the certificate. If you deploy it locally, you can use the temporary administrator user to deploy it directly. This is why it is not recommended to install it in docker. If you need to deploy a certificate to a remote server, it is more complicated. You can refer to here
1 | # Set up a temporary administrator account |
2.1 Automatic renewal
Actually, it is also possible to use a custom cronjob, just like I automatically update ddns. But if you use cronjob in Synology, Synology’s security advisor will tell you a serious warning. Although this is added by you, it is not a good mood to see this warning, so you can renew directly in Synology’s scheduled task.
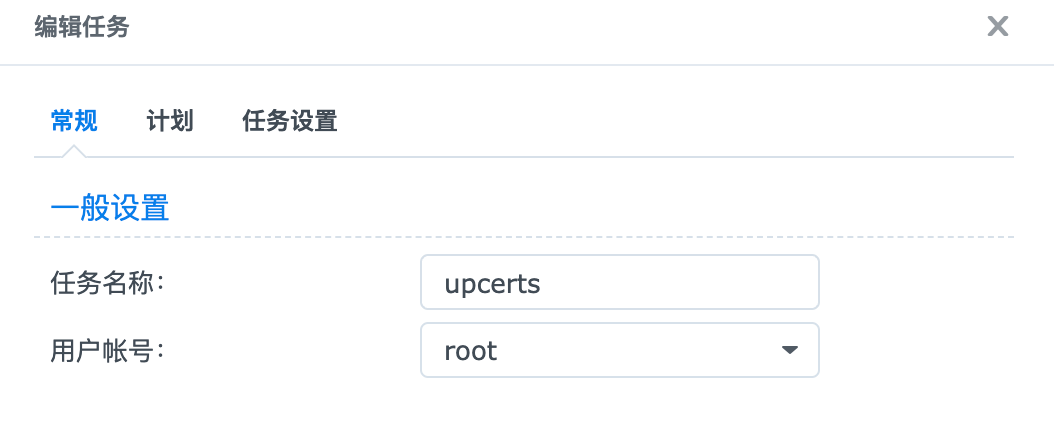
In the DSM control panel, open “Task Scheduler” and create a new scheduled task for the user-defined script.
Select the user account as root, and then enter the custom user script in the task settings:
I set the start time to the first Monday of each month, you can also set it yourself
1 | # renew certificates |