
My main computer is the iMac 5K 2017 model I bought in 2018. It supports P3 wide color gamut, but the CPU is still behind the times, still I5 3.4G. Whether it is running local large models, compiling, or video editing, it is not good enough.
Just in time for the launch of the M4 Mac mini, it can be said to be the king of cost performance, so I ordered it directly. But I thought about the choice of monitor for a long time, and I really couldn’t find a substitute. I also considered Dell’s u2723qe, a 27-inch 4K screen, with a panel similar to the iMac, but finally gave up.
First of all, the u2723qe costs RMB 3,200 without a discount, and secondly, the iMac can only be sold for less than 2,400 yuan in the second-hand market, which means I need to pay an extra 800 yuan for a 4K screen. If I can transform the iMac into a monitor, it may save more money.
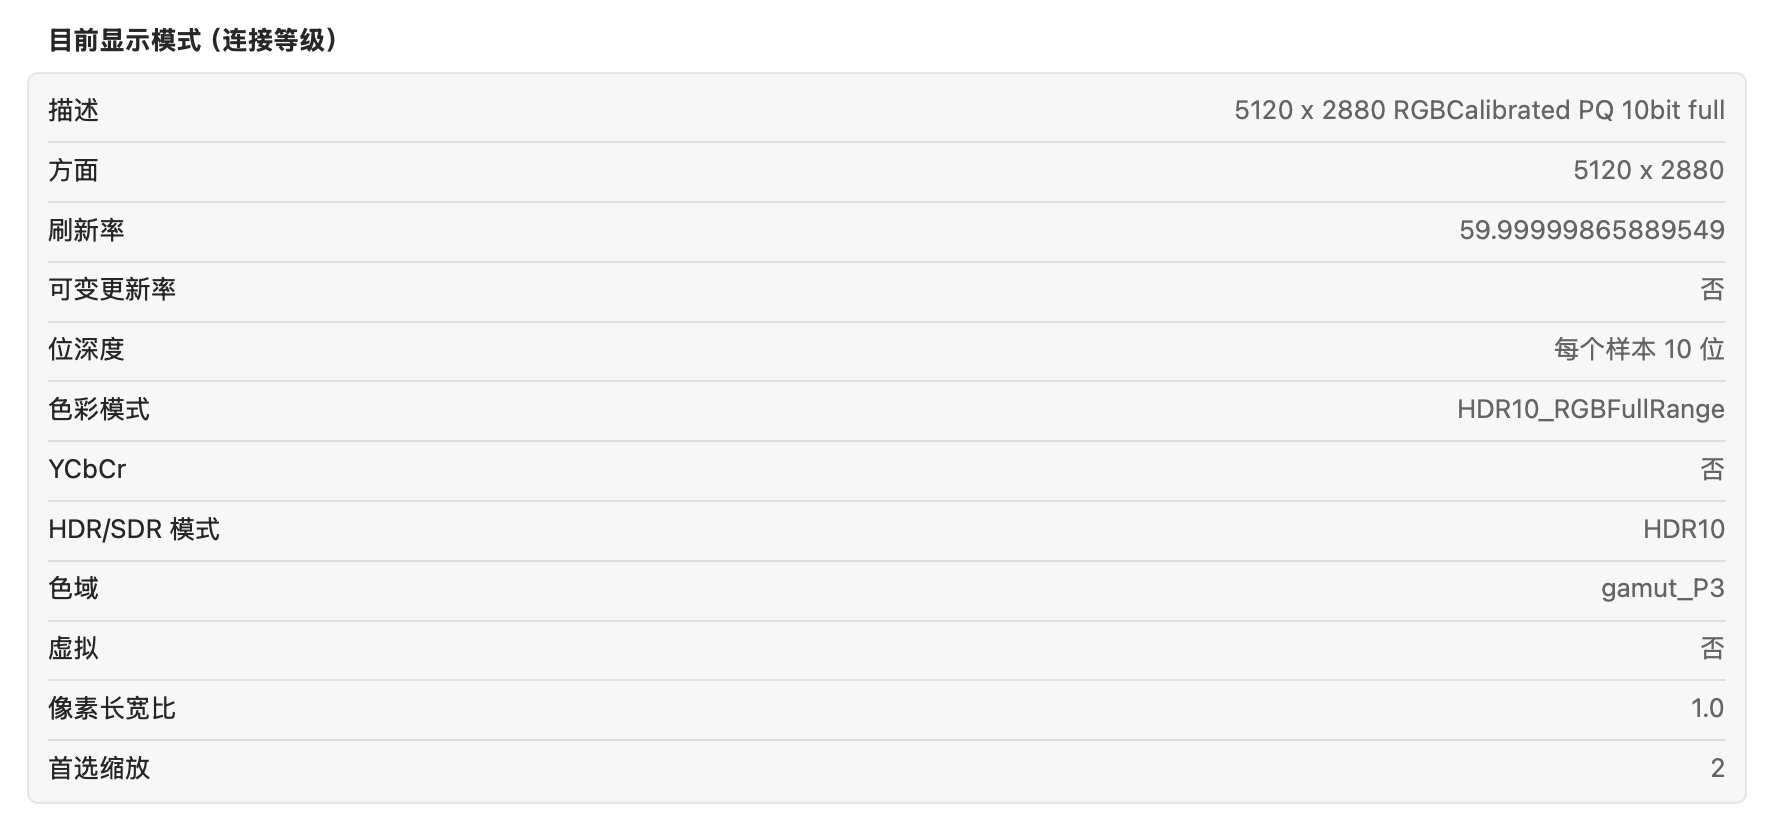
In the end, I spent RMB 316 to get a screen equivalent to Studio Display, which has its own speakers, microphone, camera, supports P3 wide color gamut, supports 10-bit color depth, supports HDR and HiDPI, and can also use media keys to control brightness and volume.
Shopping List
5K driver board JRY-W9CUHD-AA1 typec LM270QQ1/LM270QQ2 5120*2880 Price 840
12V5A power adapter 3C certified power adapter Price 33.5
USB driver-free microphone module Price 45.24
USB self-contained driver board 12 million pixels, 135 degree wide-angle 4K lens Price 172
Bluetooth amplifier + divider 88
Full-function USB Type-c data cable 38
Total price 1216.74
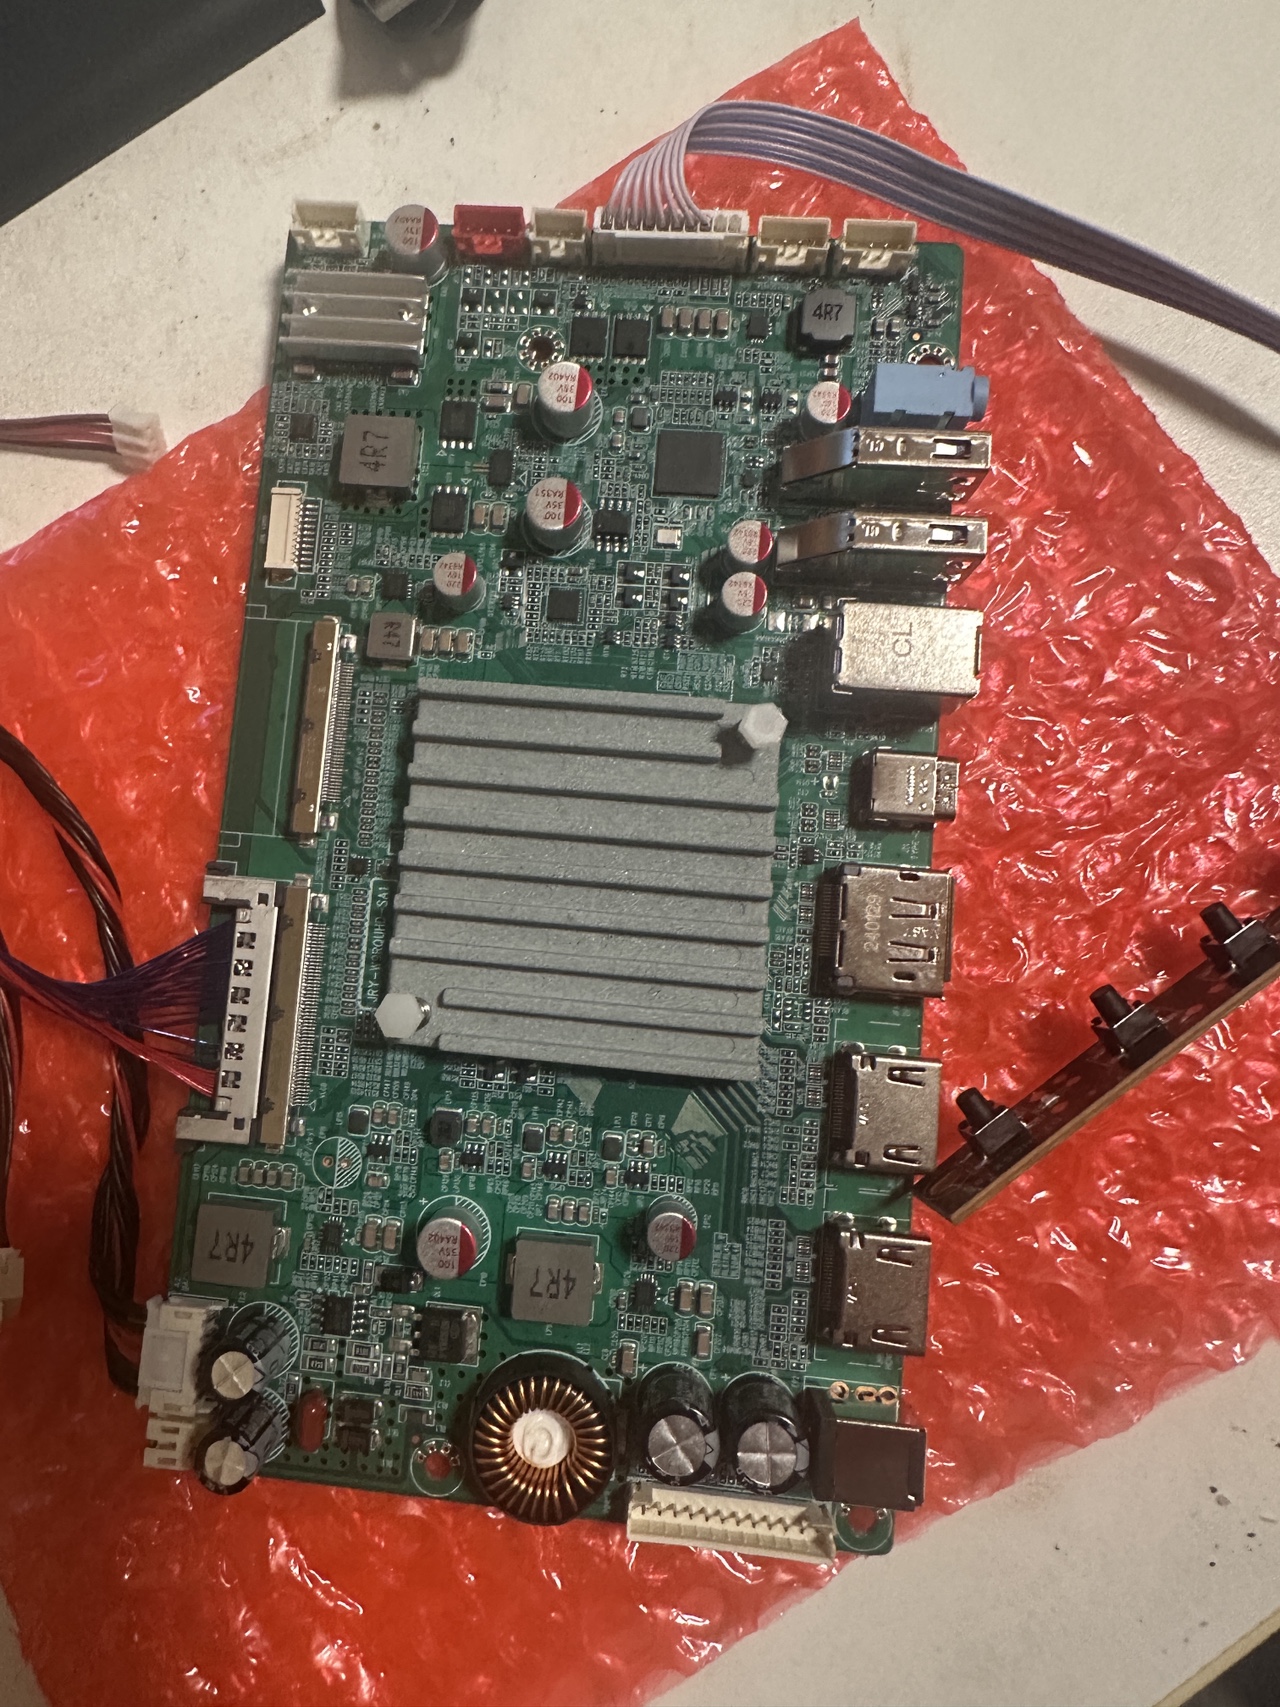
5K display driver board
This is the core of the transformation. In fact, there are currently three models of boards that can be used.
R1811 This is more expensive, about 1500 yuan, and it can use a 1.4 DP cable to achieve 5K
R9A18 This is relatively cheap, about 600 yuan, it must use two 1.2 DP cables to achieve 5K, but I searched online and found that someone can reach 5K with one cable. I am not sure whether it is feasible, because it is not feasible from a theoretical point of view
JRY-W9CUHD-AA1 This price is in the middle. In fact, if you don’t pursue 10-bit color depth, it is also about 600 yuan. But since the screen supports 10-bit color depth, although I may not use it, it is worth spending 840 yuan to achieve the same effect as Studio Display
JRY-W9CUHD-AA1 This board looks like this, and it has a rich interface.
There are two HDMI interfaces, a DP interface, a type C interface, two USB A interfaces and a USB B interface, as well as a headphone output interface, which makes it possible to transform Studio Display.
Renovation begins
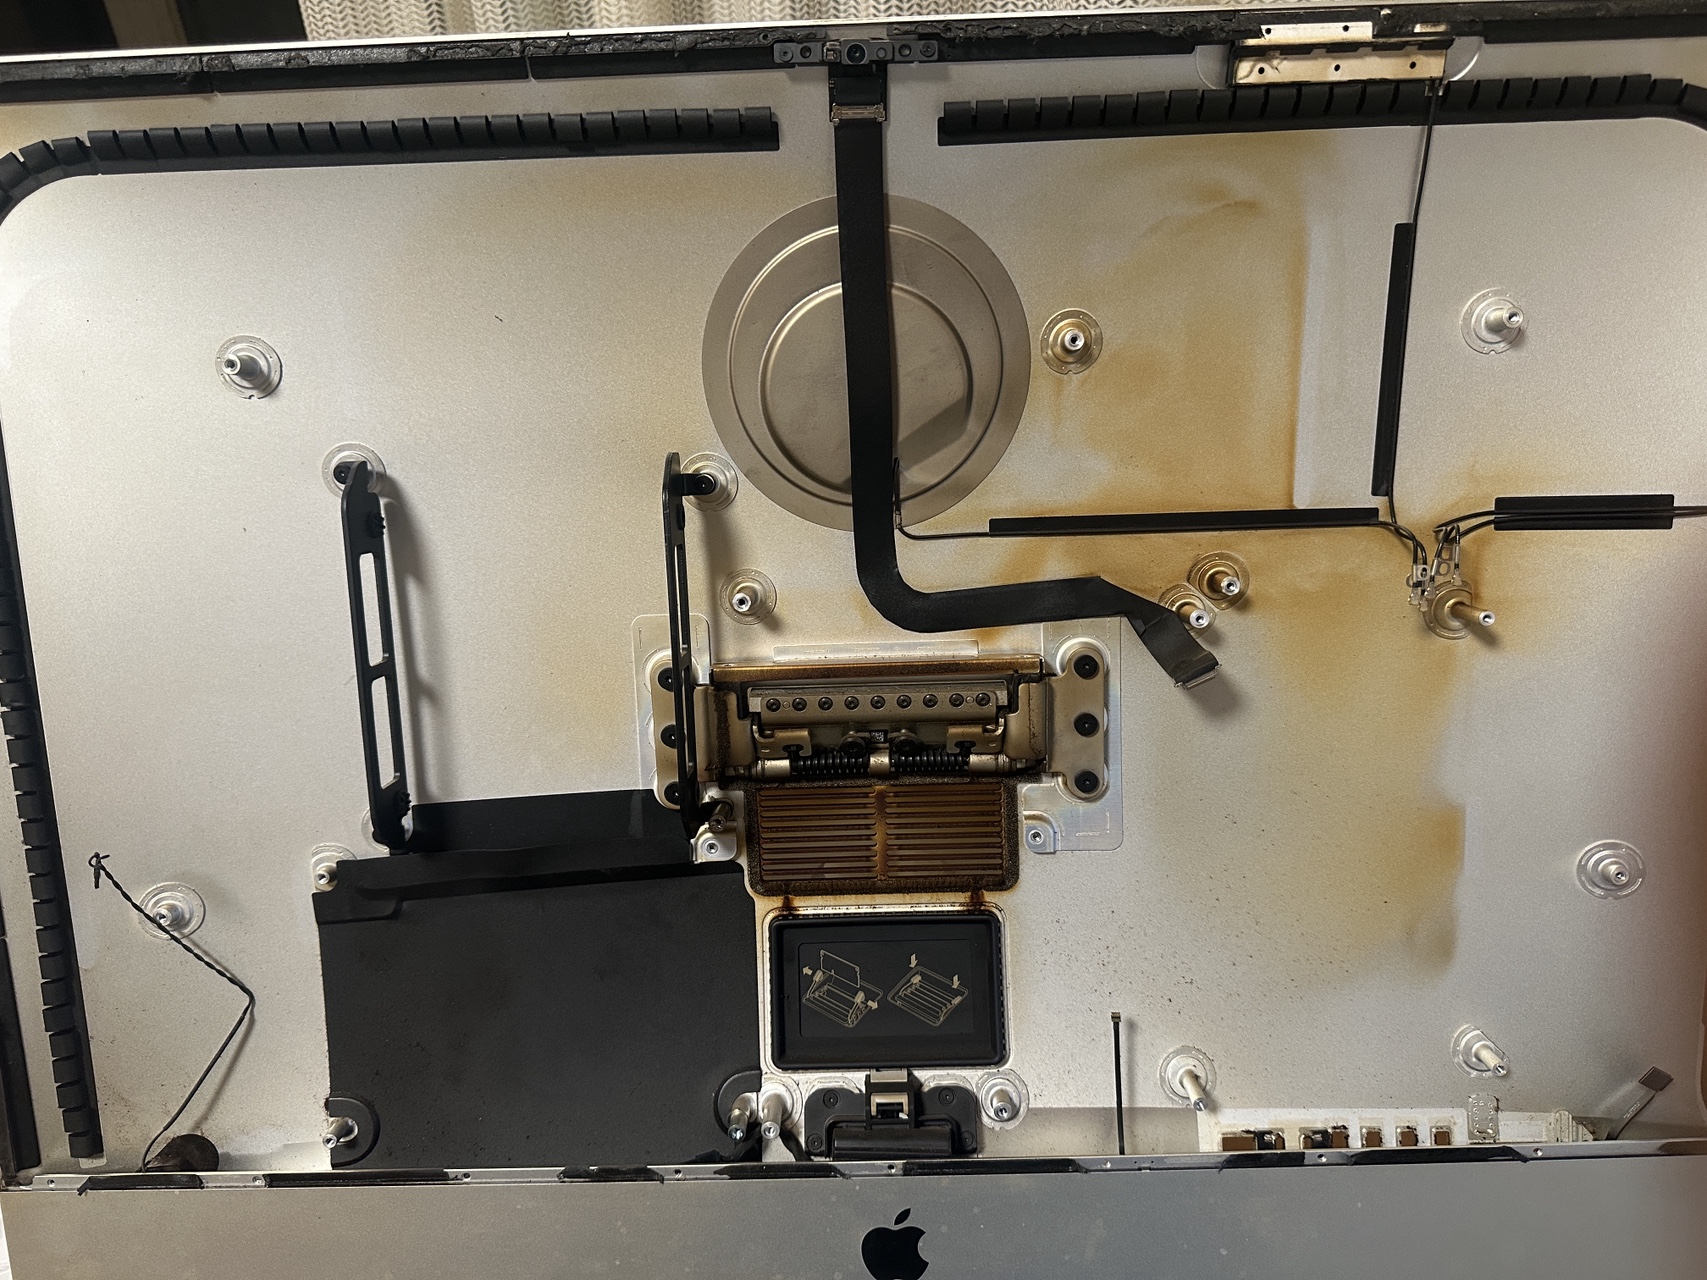
I completely referred to the experience on iFixit to disassemble the machine. I strongly recommend reading it carefully several times, and it is best to have a computer next to you to check it at any time.
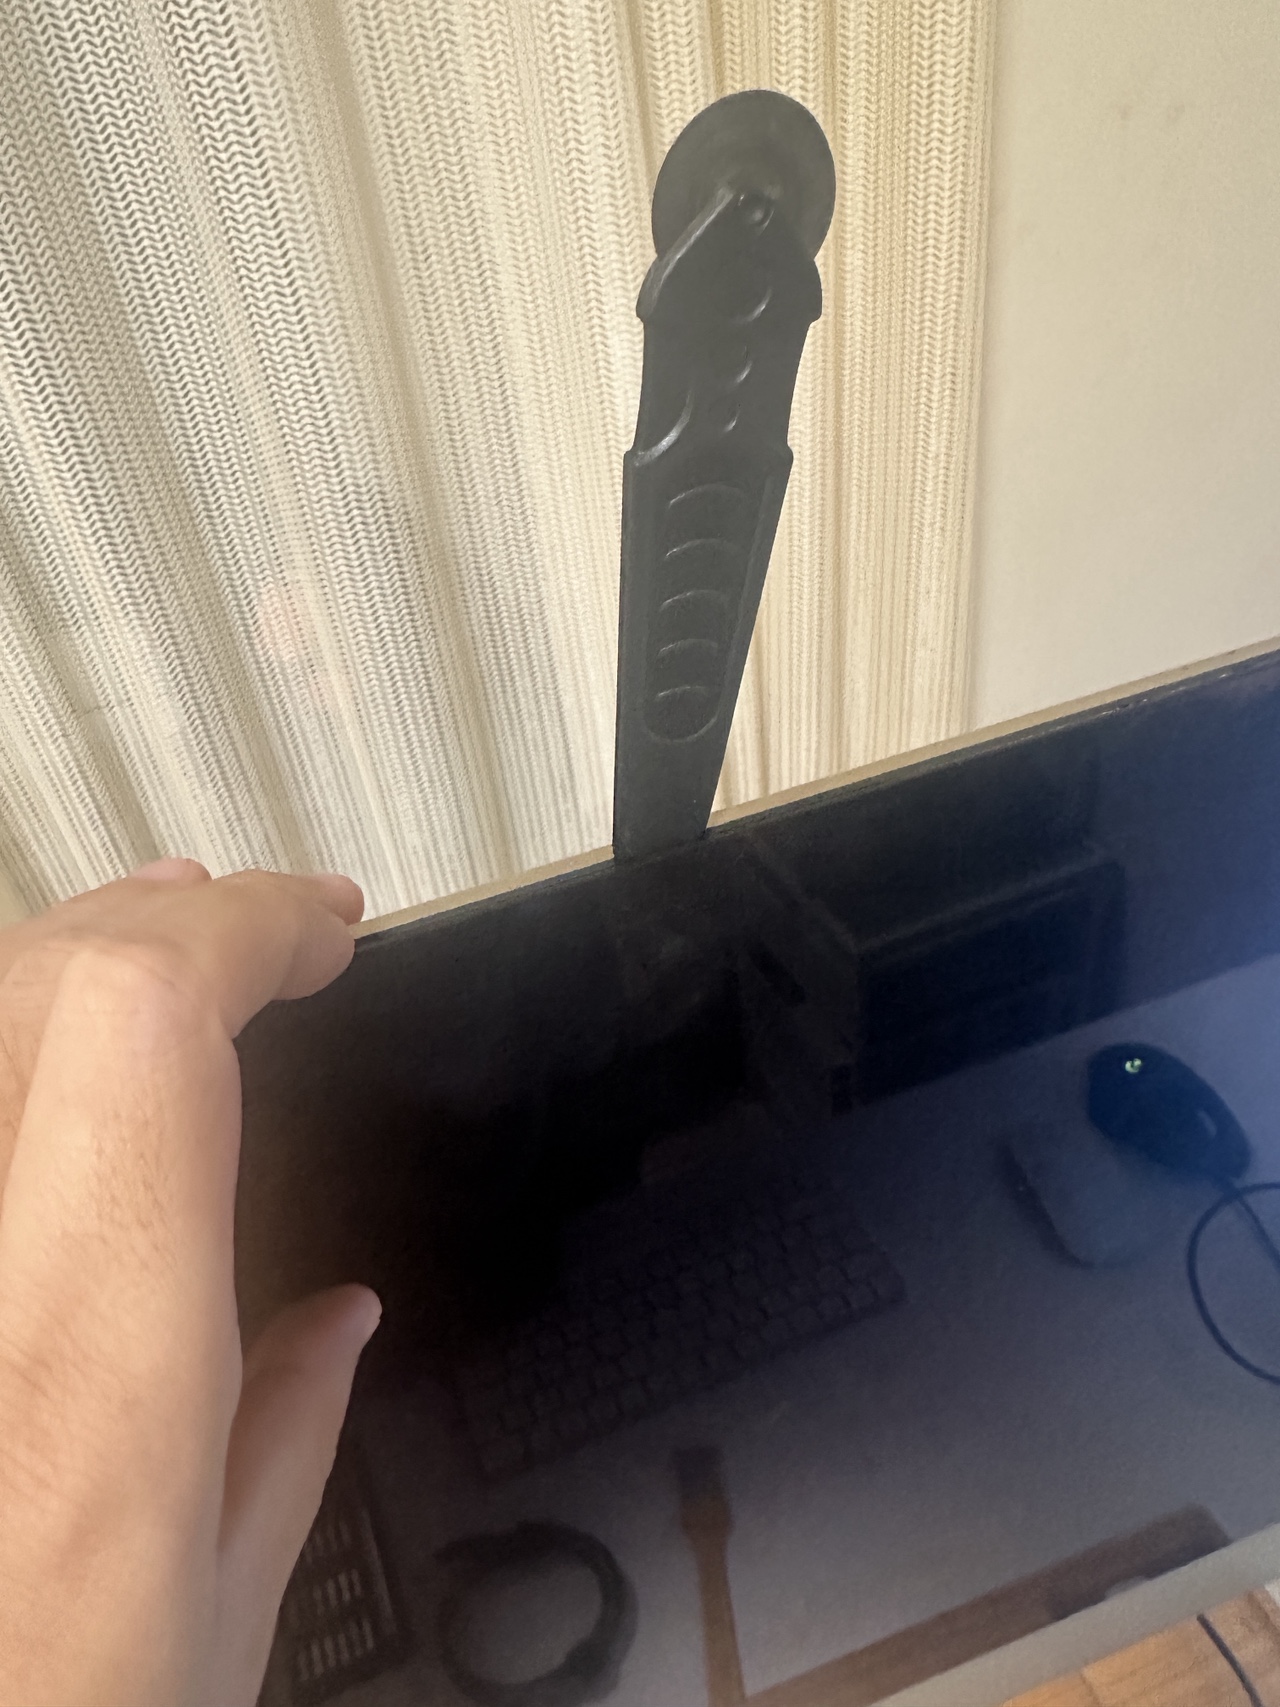
1. Remove the glue
This separation tool is needed to separate the screen. One side of it is a roller to break the glue between the screen and the host frame, and the other side is a knocking stick, which you can use to achieve the final separation (I did not use the card tool)
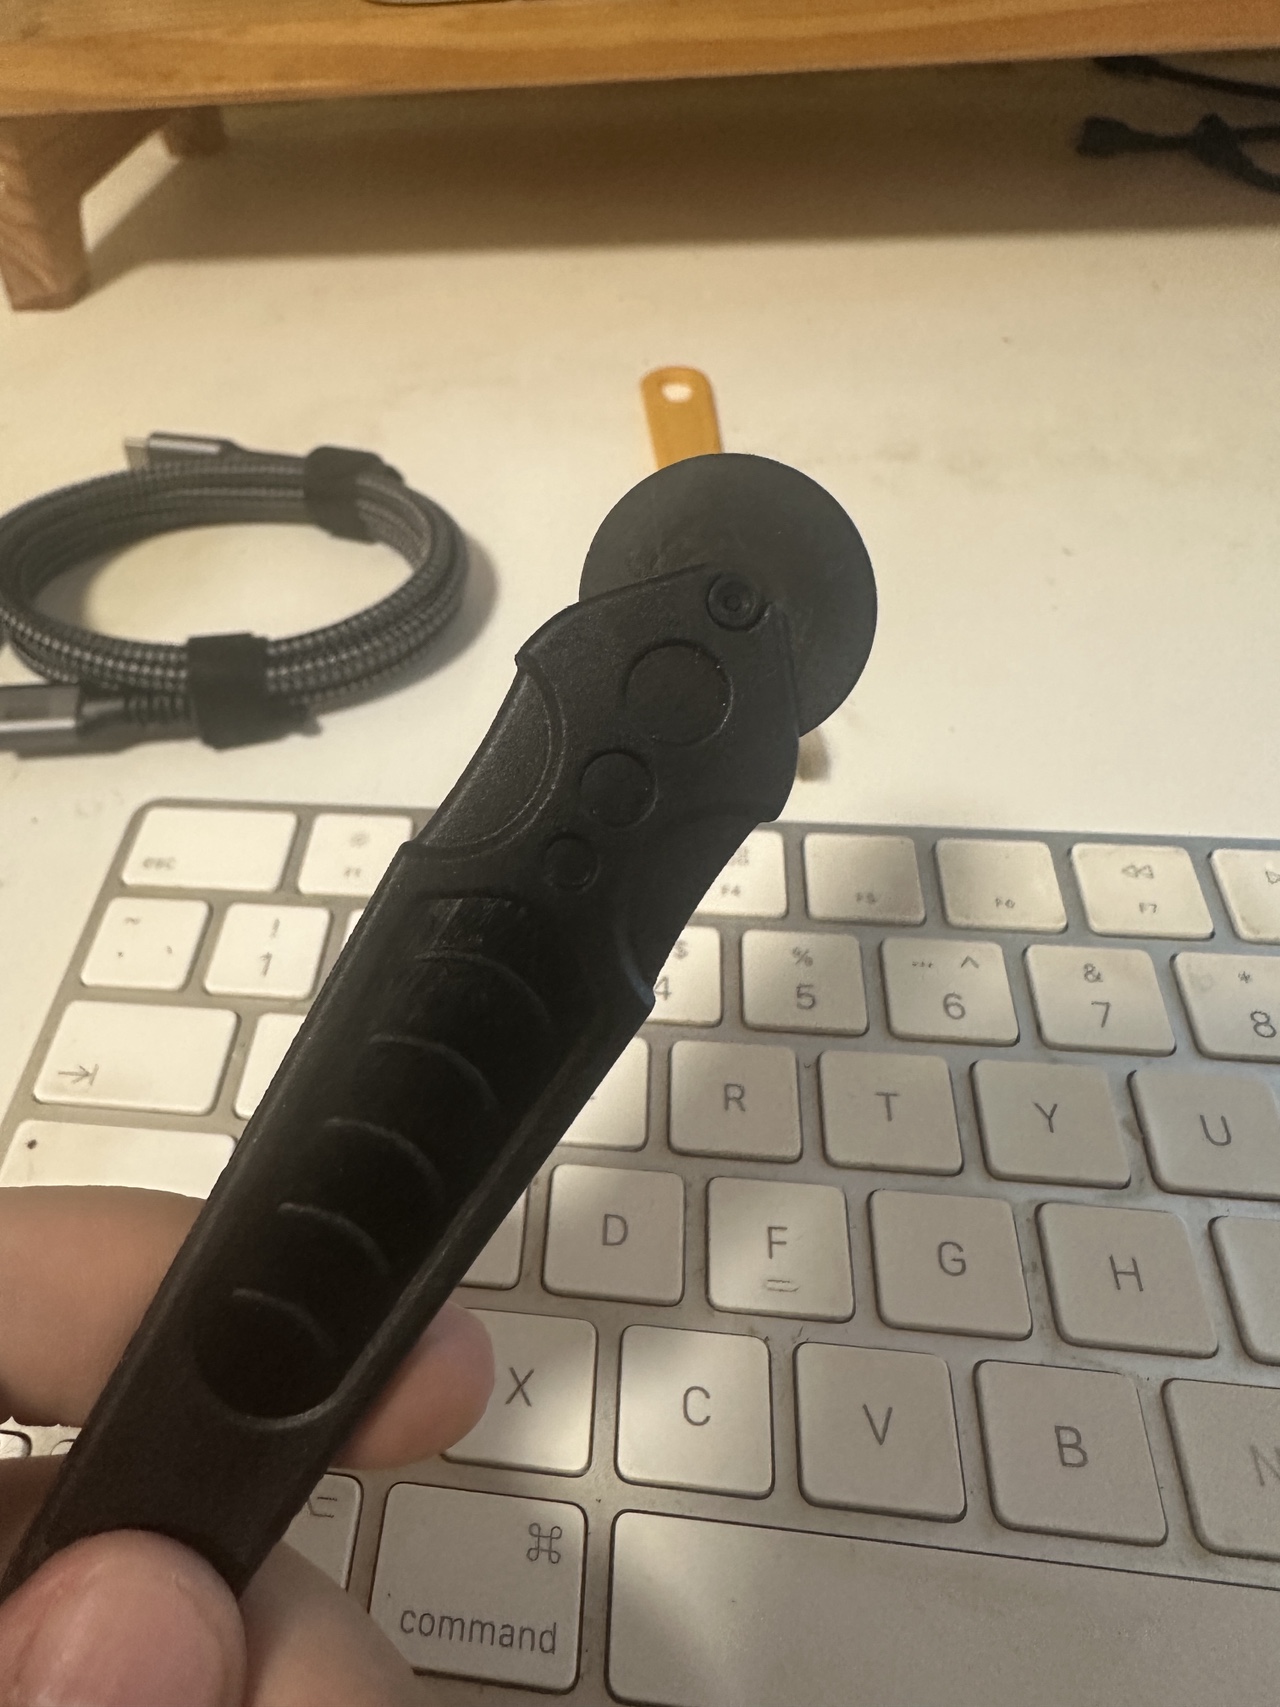
The depth of this tool is just enough to prevent you from damaging the camera module on top of the iMac, so you can roll it boldly. The trick is to be gentle when inserting, but you can be more forceful when rolling. In other words, you should insert it slowly vertically, but you can roll it faster. When the screen can roll smoothly in the left, top, and right directions, you can use the other end to slowly pry the screen to make the gap bigger and bigger. It is recommended to pry left and right, not up and down.
2. Separate the screen
When the screen can be opened, slowly pull the screen open, about 30 degrees or 40 degrees, and unplug the screen data cable and power cable according to ifix’s experience. Then you can remove the adhesive at the bottom.

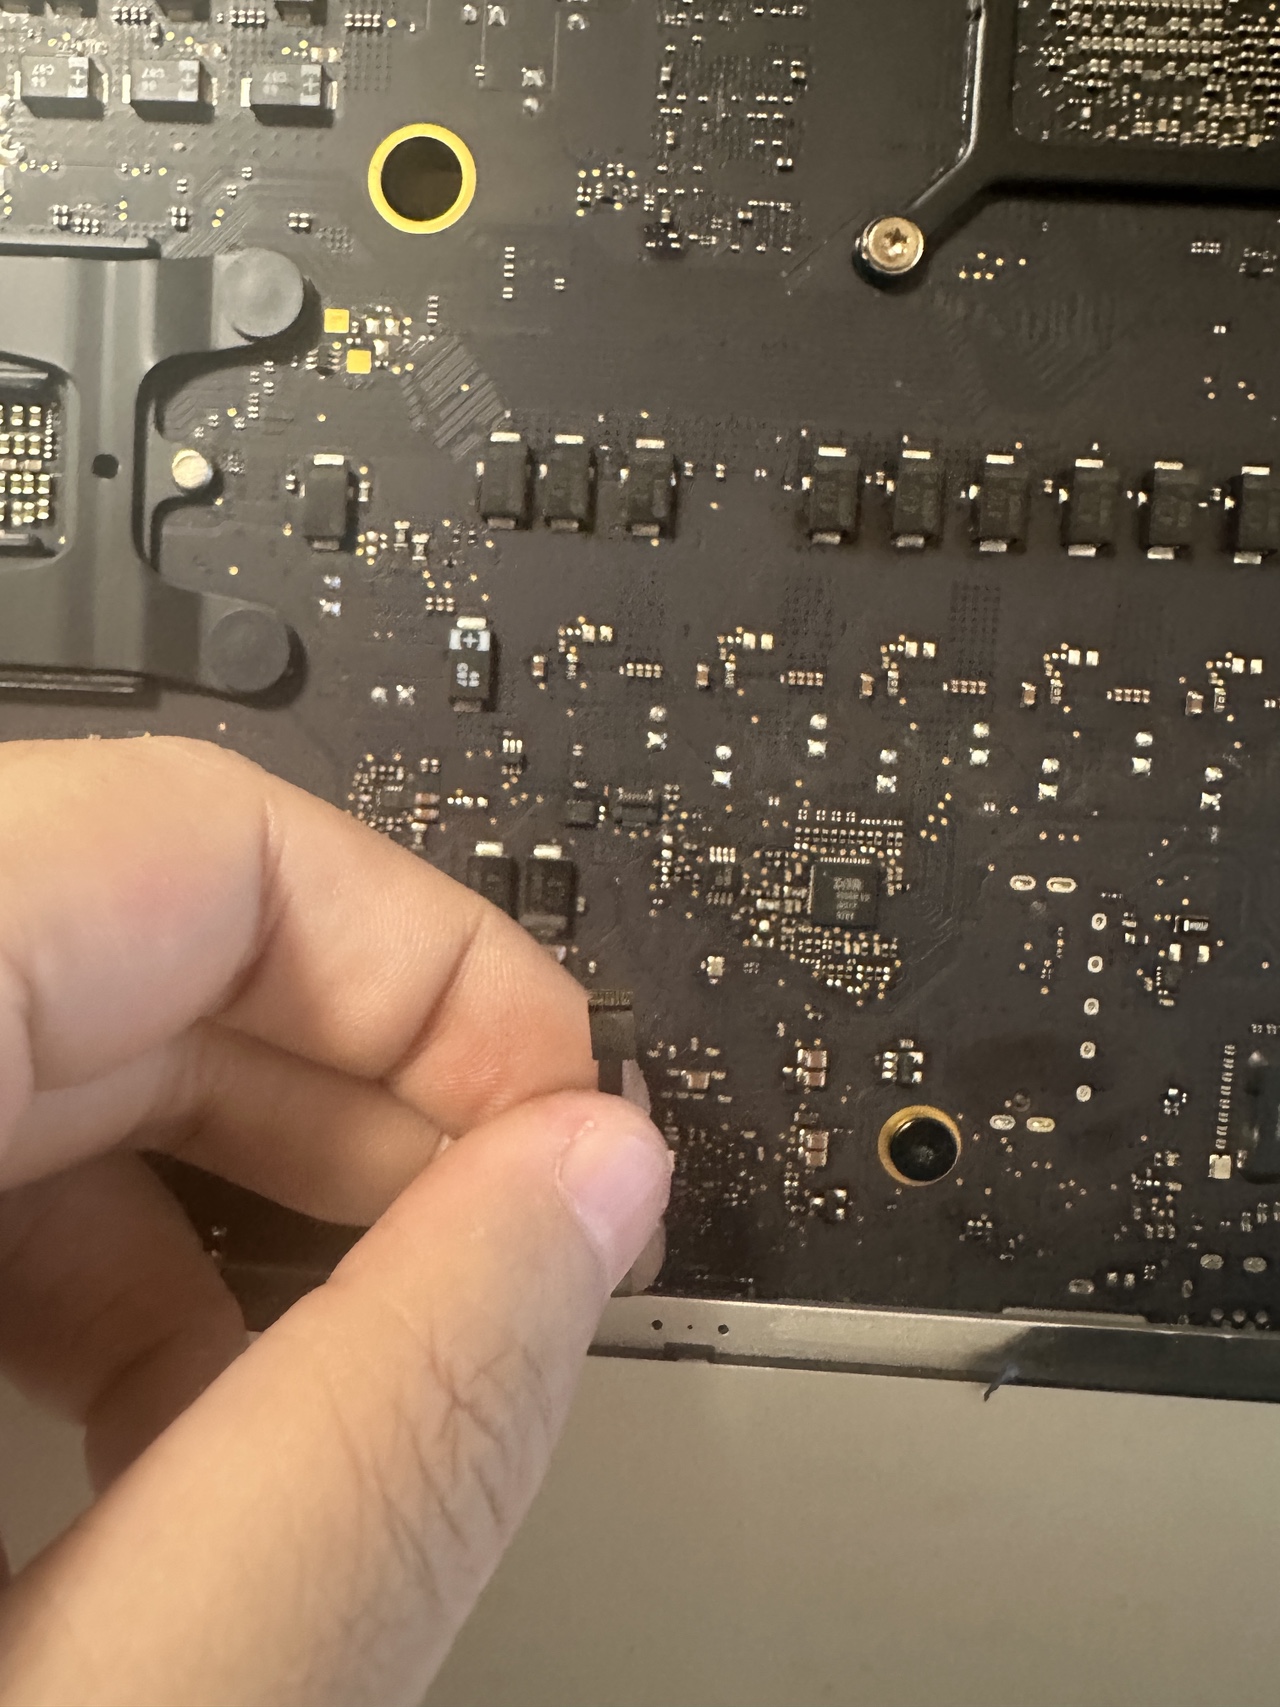
3. Disassemble the entire iMac
I want to save some time and effort, because ifix has a very detailed description. The only problem I encountered was when disassembling the microphone module, because it was too small and the wires were very thin. Since it was almost unsellable, I destroyed it directly.
The final effect is like this. I kept the camera module. I didn’t want to spend another 172 yuan to buy a camera module, but I didn’t expect that it only took me half a day to sell the second-hand accessories, so I will remove it tomorrow. Because there is no camera in this place, there will be an obvious hole above the screen, which affects the appearance.
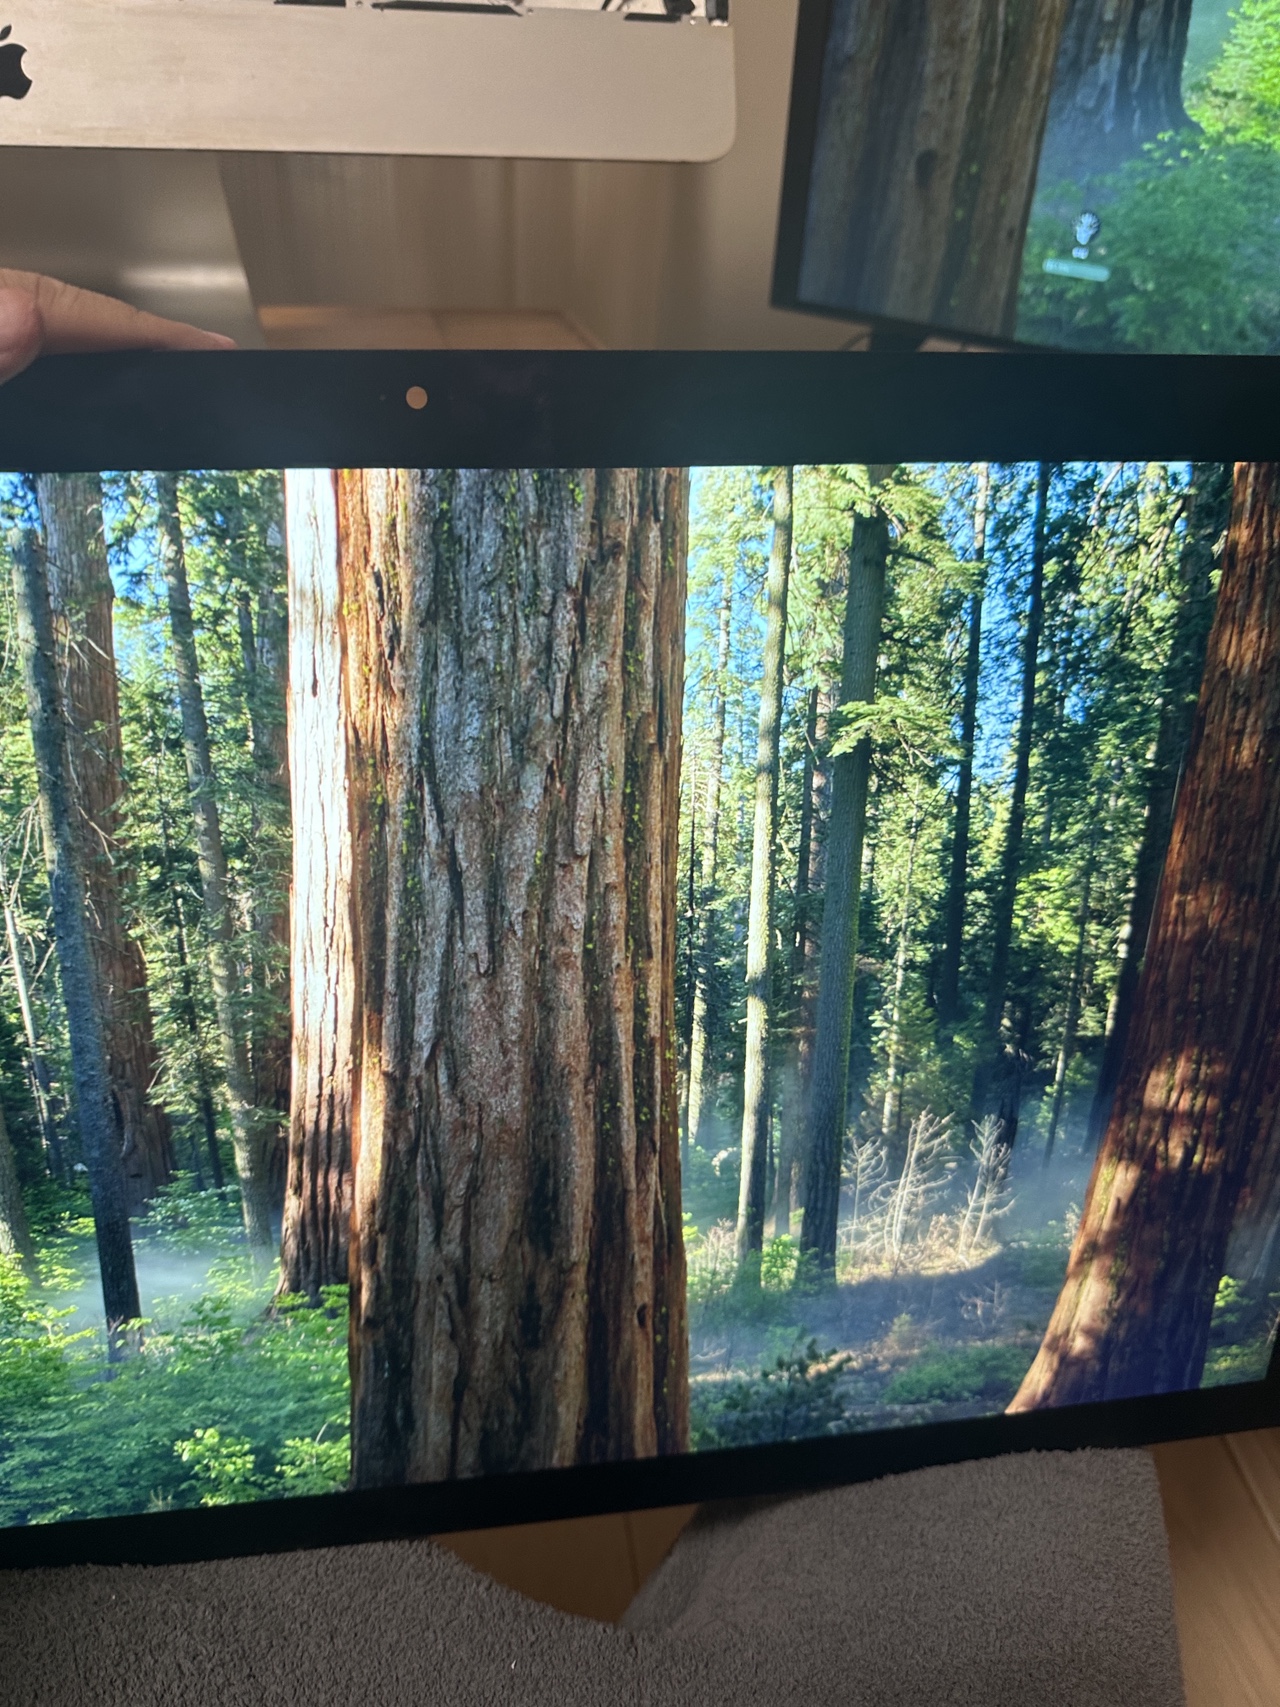
4. Screen test
I used a full-featured USB Type-c data cable that supports 8K video for connection. Try to buy a better cable. After all, there are many types of Type C cables, and poor materials will affect data transmission. We need to use this cable to transmit video data, sound data, and also transmit microphone and camera data back, so it is better to buy a better one.
Connect the data cable and power cable of the screen to the driver board, power on and test, no pressure! Then check if the resolution is 5K, then turn off the power and start wiring.
5. Install the microphone module
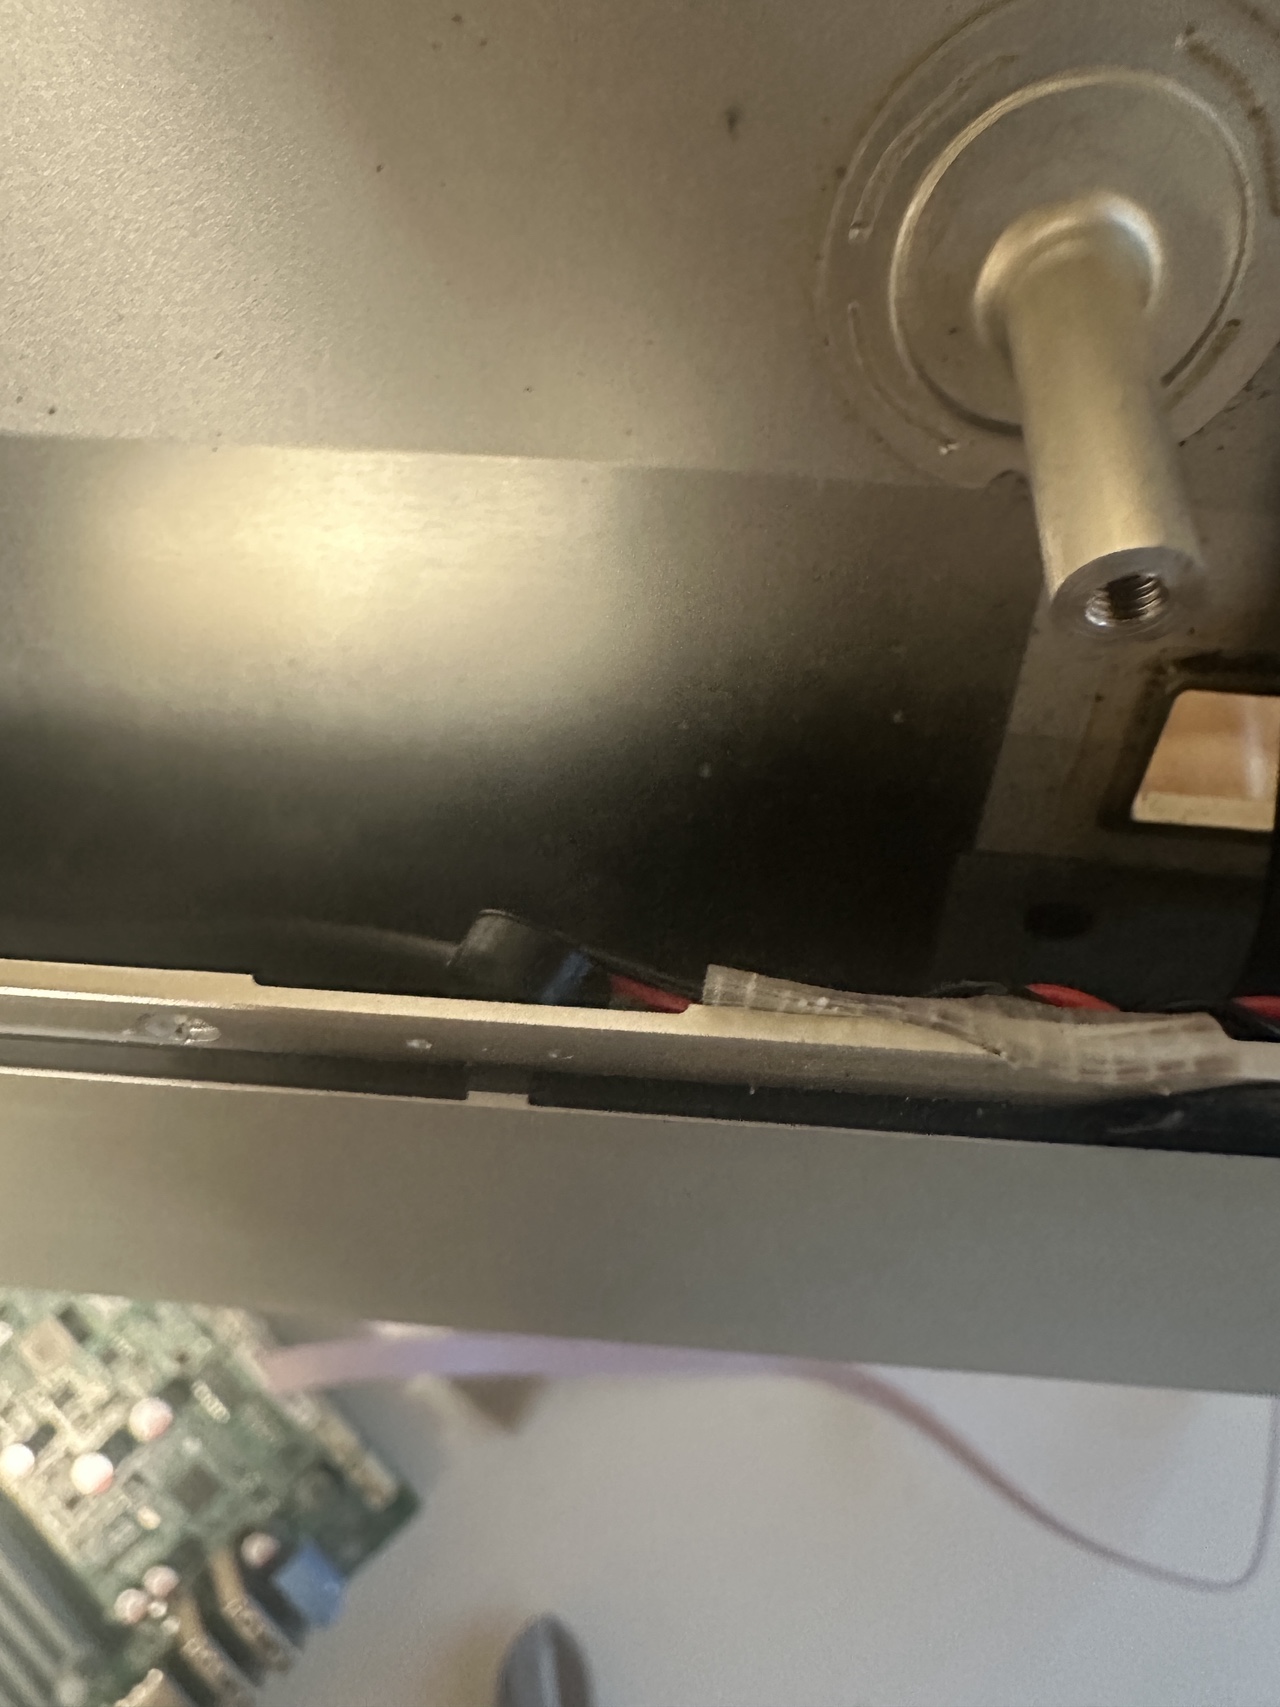
Use double-sided tape to stick the microphone module directly to the inside of the frame. This is where the original microphone of the iMac is. If you look closely, you will see two small holes for collecting sound. This design is really amazing. The sound collection effect is the same as that of the iMac. On the other side, plug the USB into the driver board.
6. Start wiring
First install the left and right speakers to their original locations. There are two options here.
Option 1. The left and right speakers can be directly connected with wires and then plugged into the audio output interface on the driver board, but without an amplifier, the sound that comes out is much different from the original iMac (although the original was not very good)
Option 2. The left and right speakers use a crossover to connect a small amplifier, and the amplifier uses the headphone jack to play the sound. The advantage of this is that the sound effect will be better, but the disadvantage is that a power cord is required to power the amplifier (I have been looking for a long time and there is no USB power supply, because this driver board supports reverse charging if it is powered by 25W)
It is recommended to put the driver board in the original iMac power board position, because it has an insulating sticker on the back, which is more convenient. Just stick the four corners with double-sided tape (choose 2.5 mm thick).
Then stick the two crossovers and the small amplifier to the back of the frame. The following wires are out of the memory port.
- Driver board power cable
- Type C cable
- Amplifier power cable
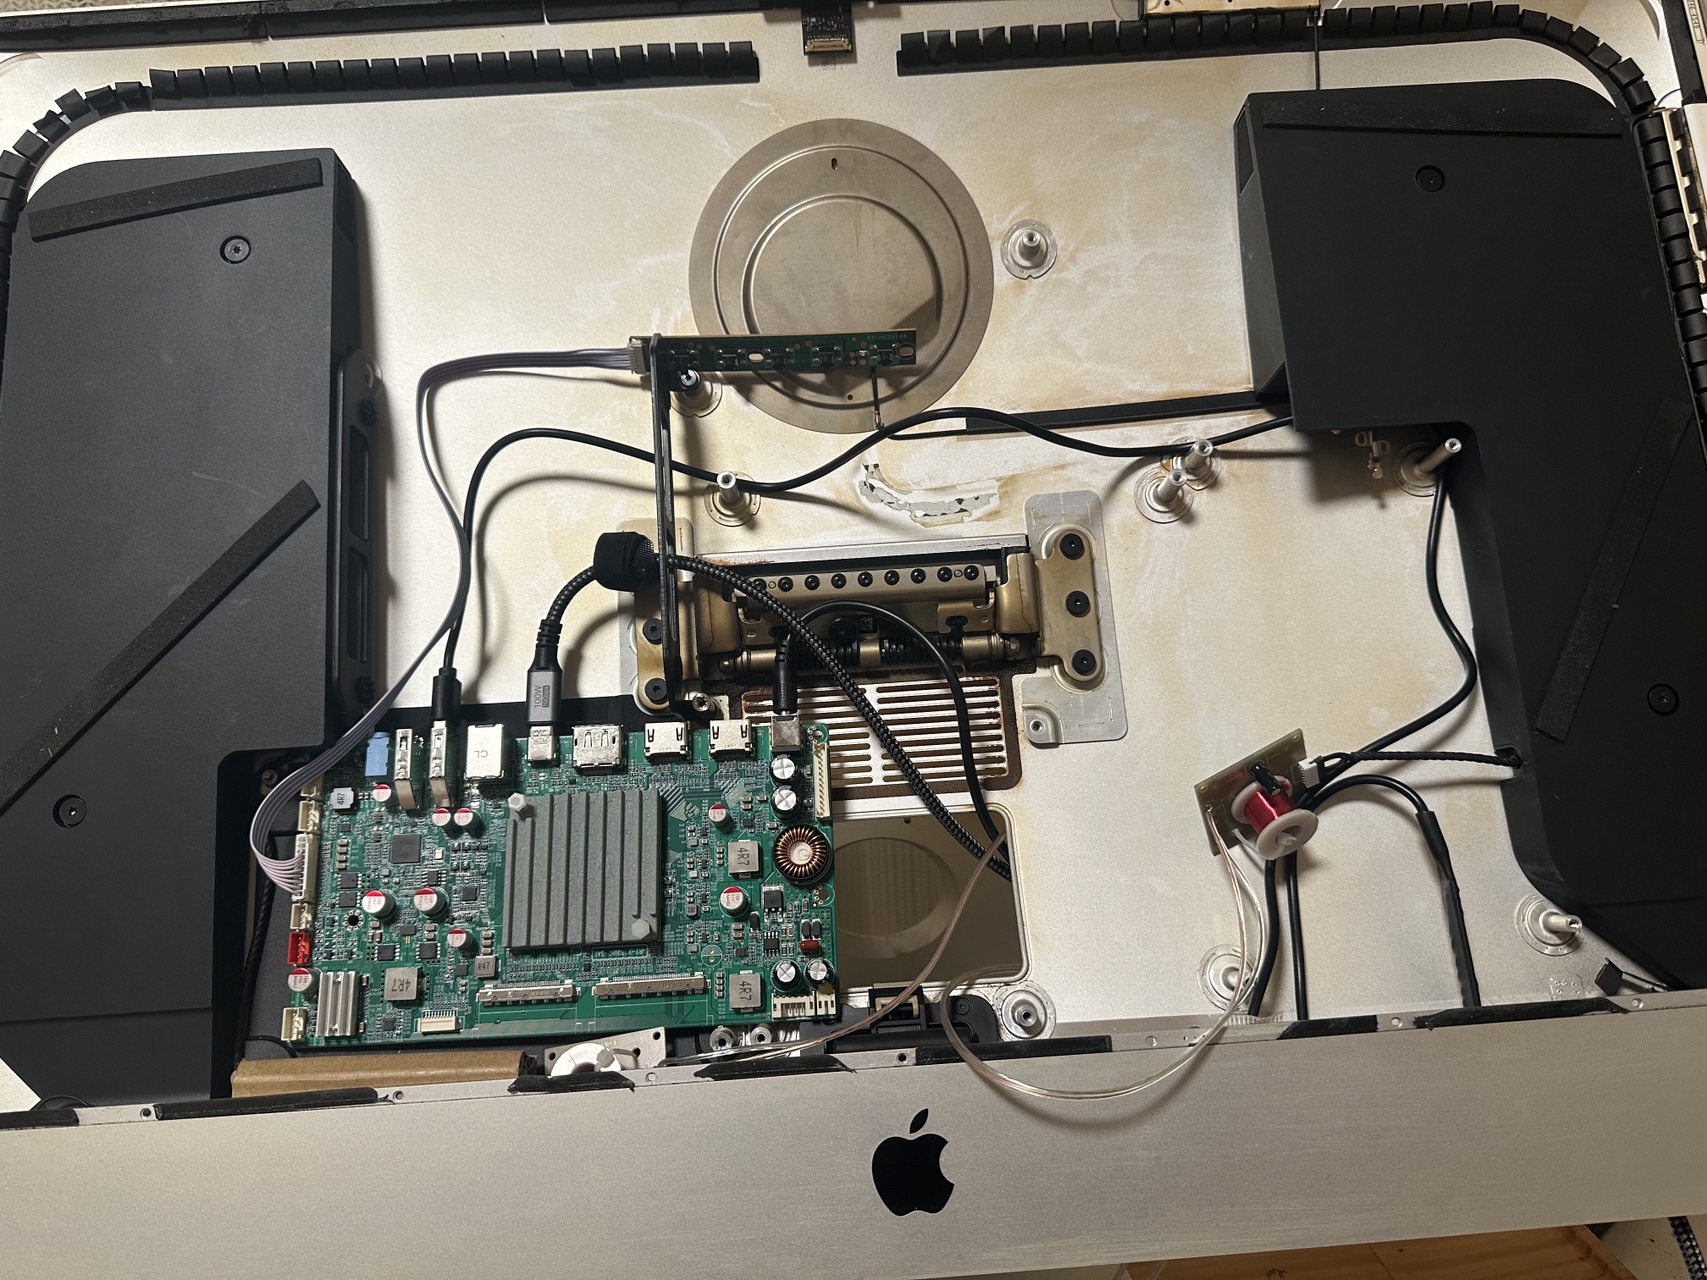
7. Final effect
The final effect achieved 5K resolution, HDR10bit, P3 wide color gamut
Shortcut keys
Next, you will need to use two apps to implement shortcut keys to control brightness and sound. After all, if you use your hands to adjust the screen and the volume, it can’t be called a Studio Display.
Sound Source
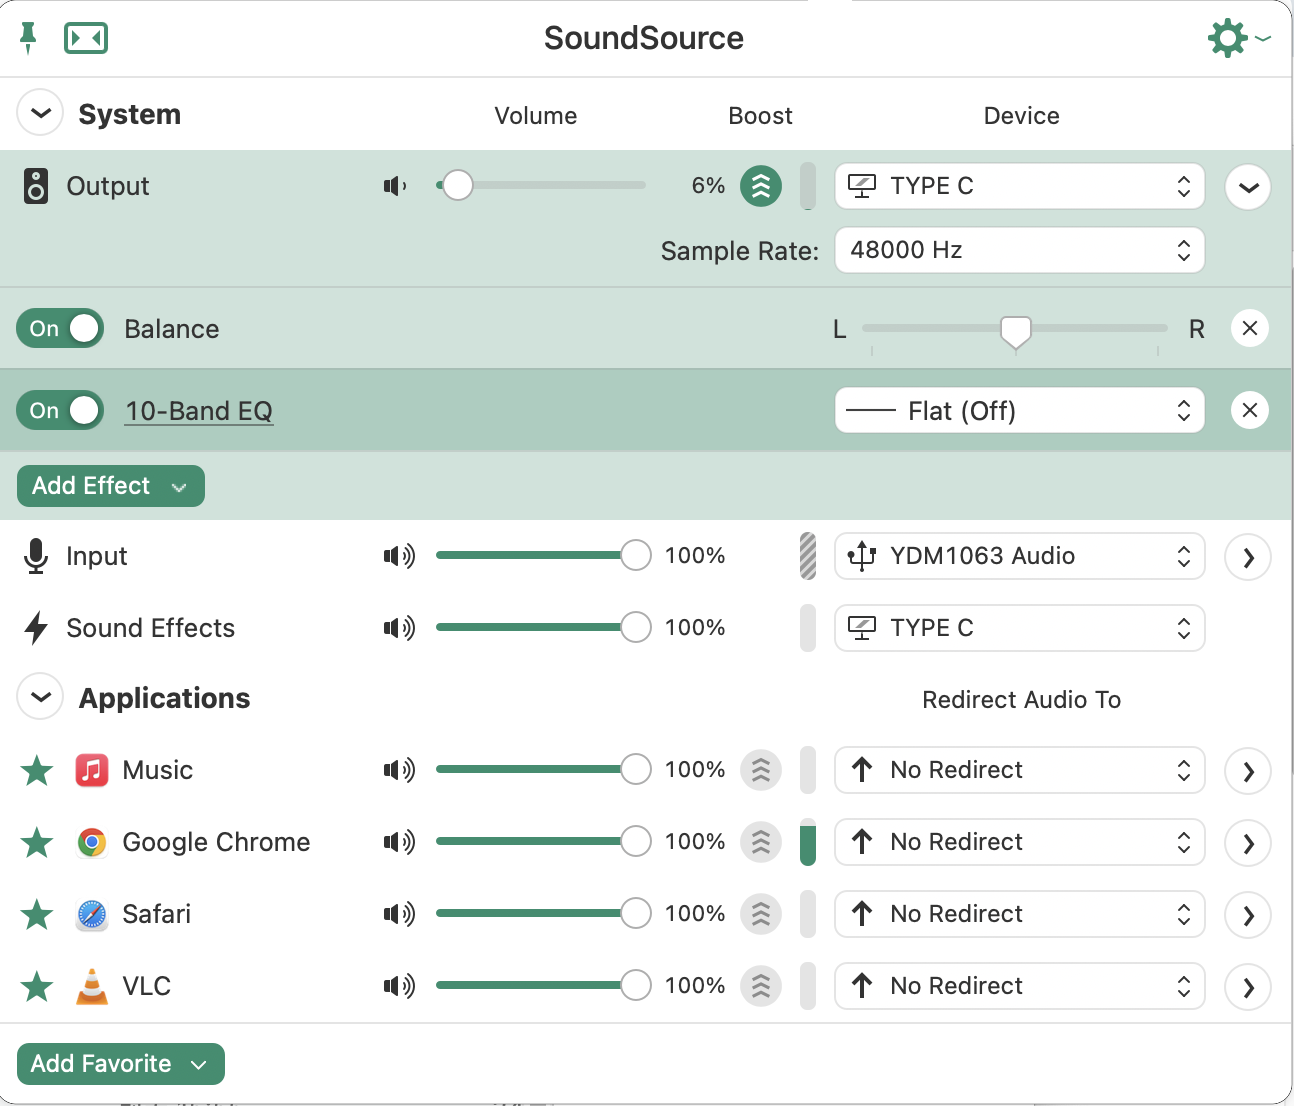
After installing this APP, you can use multimedia shortcut keys to adjust the volume, including muting, and the small amplifier itself can be placed in the frame of the iMac, without manual adjustment.
MonitorControl
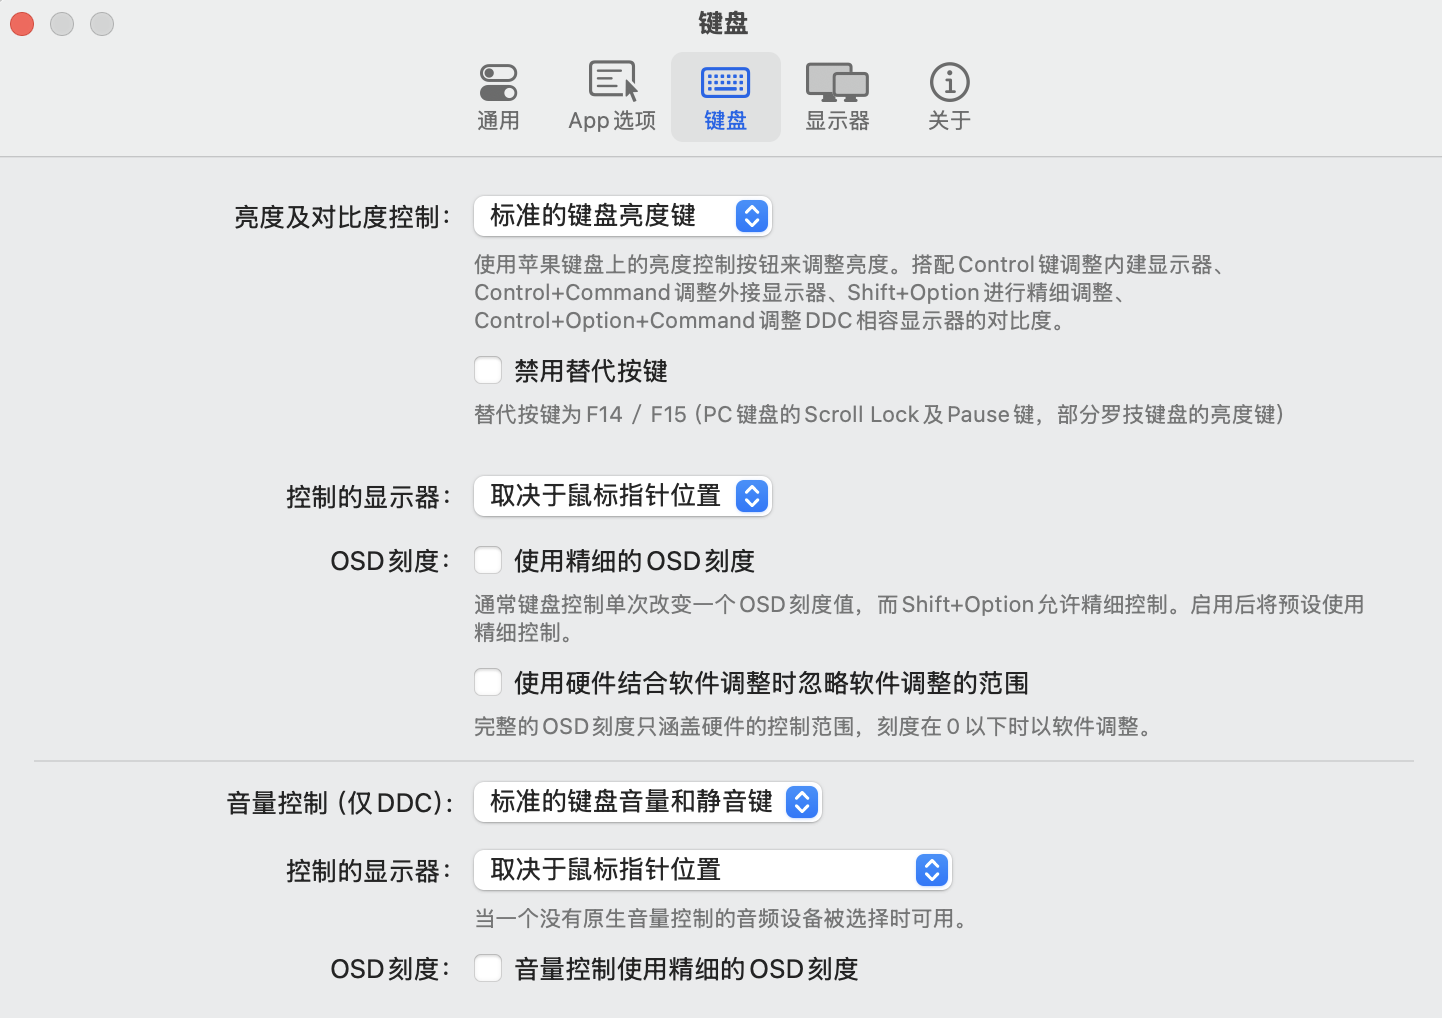
Using this APP, you can control the brightness of two screens at the same time. You can adjust the brightness of the screen on which the mouse is placed, or adjust it synchronously. (It is said that if DDC is turned on, the sound can be adjusted with this APP alone, but I still think Sound Source is more useful. After all, it can realize the sound control of each APP, and can also control the size of the microphone, etc., and switch whether the sound is played by the speaker or the Mac mini at any time)
Finally
Originally, I didn’t plan to buy a camera module. After all, 172 yuan is quite expensive. The most important thing is that I hardly use the camera. It was only used once for registration on some websites and KYC certification.
However, I sold the disassembled logic motherboard, hard drive, memory, power board, and fan for 900 yuan, so I still placed an order to buy a camera. I didn’t expect that I sold it very quickly. I took the photos and put them on the second-hand platform in the morning, and someone bought it in the afternoon. Maybe my price was relatively cheap.
So I spent a total of RMB 1216.74 for the modification, and sold the disassembled parts for RMB 900, which means I spent a total of RMB 316.74 to get the same screen as the Studio Display.
The price of Studio Display is RMB 11499. Even if I sell the iMac for RMB 2400, I still need to spend RMB 9099.
If I buy Dell’s 4K display directly, I need to spend RMB 800 and only get a 4K display, which has no speakers, no microphone, and no camera.
If you also have an iMac and buy a Mac mini, I strongly recommend that you do it yourself. It is very cost-effective and very rewarding!