Recently, due to work needs, I hope to do a mass email, about 80,000 emails to different people, modify some content, and attach attachments. The principle is actually very simple. There are some existing projects on github that can be used, but the projects are very old and need to adjust the code. At the same time, some existing mass email tools are cloud-based, and the attachments I want to send actually want to be sent point-to-point, not uploaded to the cloud.
It happens that I am studying N8N recently. This is an open source that supports self-deployment and can be installed on a local server or home NAS, so this is a good attempt to ensure data security, and later on, email tracking and modification can be performed through a large model.
N8N installation
1. Install using docker compose
N8N installation can be selected as cloud-based, self-hosted, or system-embedded. I installed it directly in my NAS’s docker.
You can choose PostgresDB as a backup database, or you can add Redis, but since I am using it alone, I think the built-in SQLite is enough, which makes installation very simple.
1 | services: |
You can use bridge mode or host mode. If you use host, the port number needs to be declared in the environment variable.
In addition, two paths are mapped, one is the local file of n8n, including configuration information and database, and the other is the path where the binary file is saved. You don’t need to set this, but if you need to read the mail list from Excel later, you can only save it in something like Google Sheets. I don’t want to upload the data to the cloud, so I map an address and put the Excel file here for the n8n node to read.
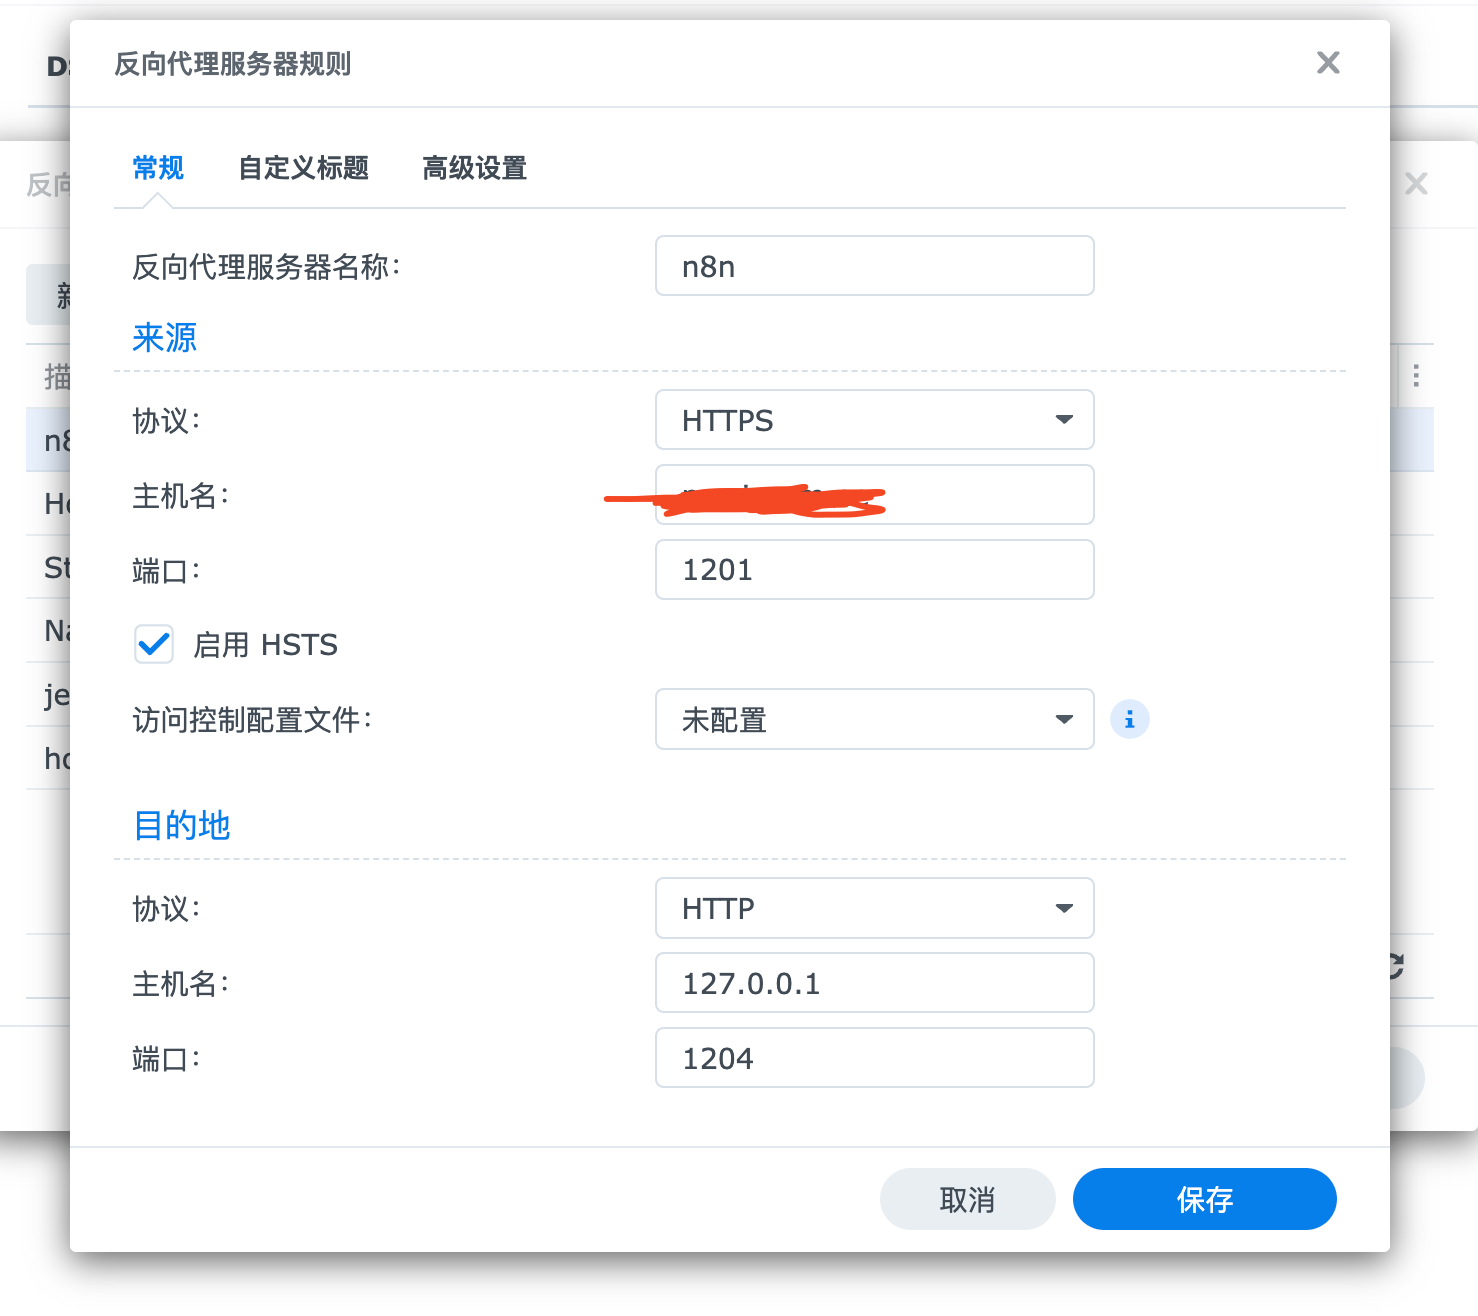
2. Port forwarding
In the router, forward the port you want to bind the SSL certificate to, not 1204, but 1201. These two are set by you, just define them
3. nginx proxy
After the port forwarding takes effect, use the reverse proxy server that comes with Synology
Be sure to add WebSocket in the custom title, which includes Upgrade and Connection. I remember an article saying that there will be some problems if you don’t add it, but I have added all my reverse proxies
One advantage of using the reverse proxy server that comes with Synology is that you don’t have to manage SSL certificates separately. If you don’t use this, you can also start an Nginx yourself, but it’s not necessary. You still have to import the certificate, which is currently once every three months. Although you can use acme to achieve automation, it is completely unnecessary
Start setting up the N8N process
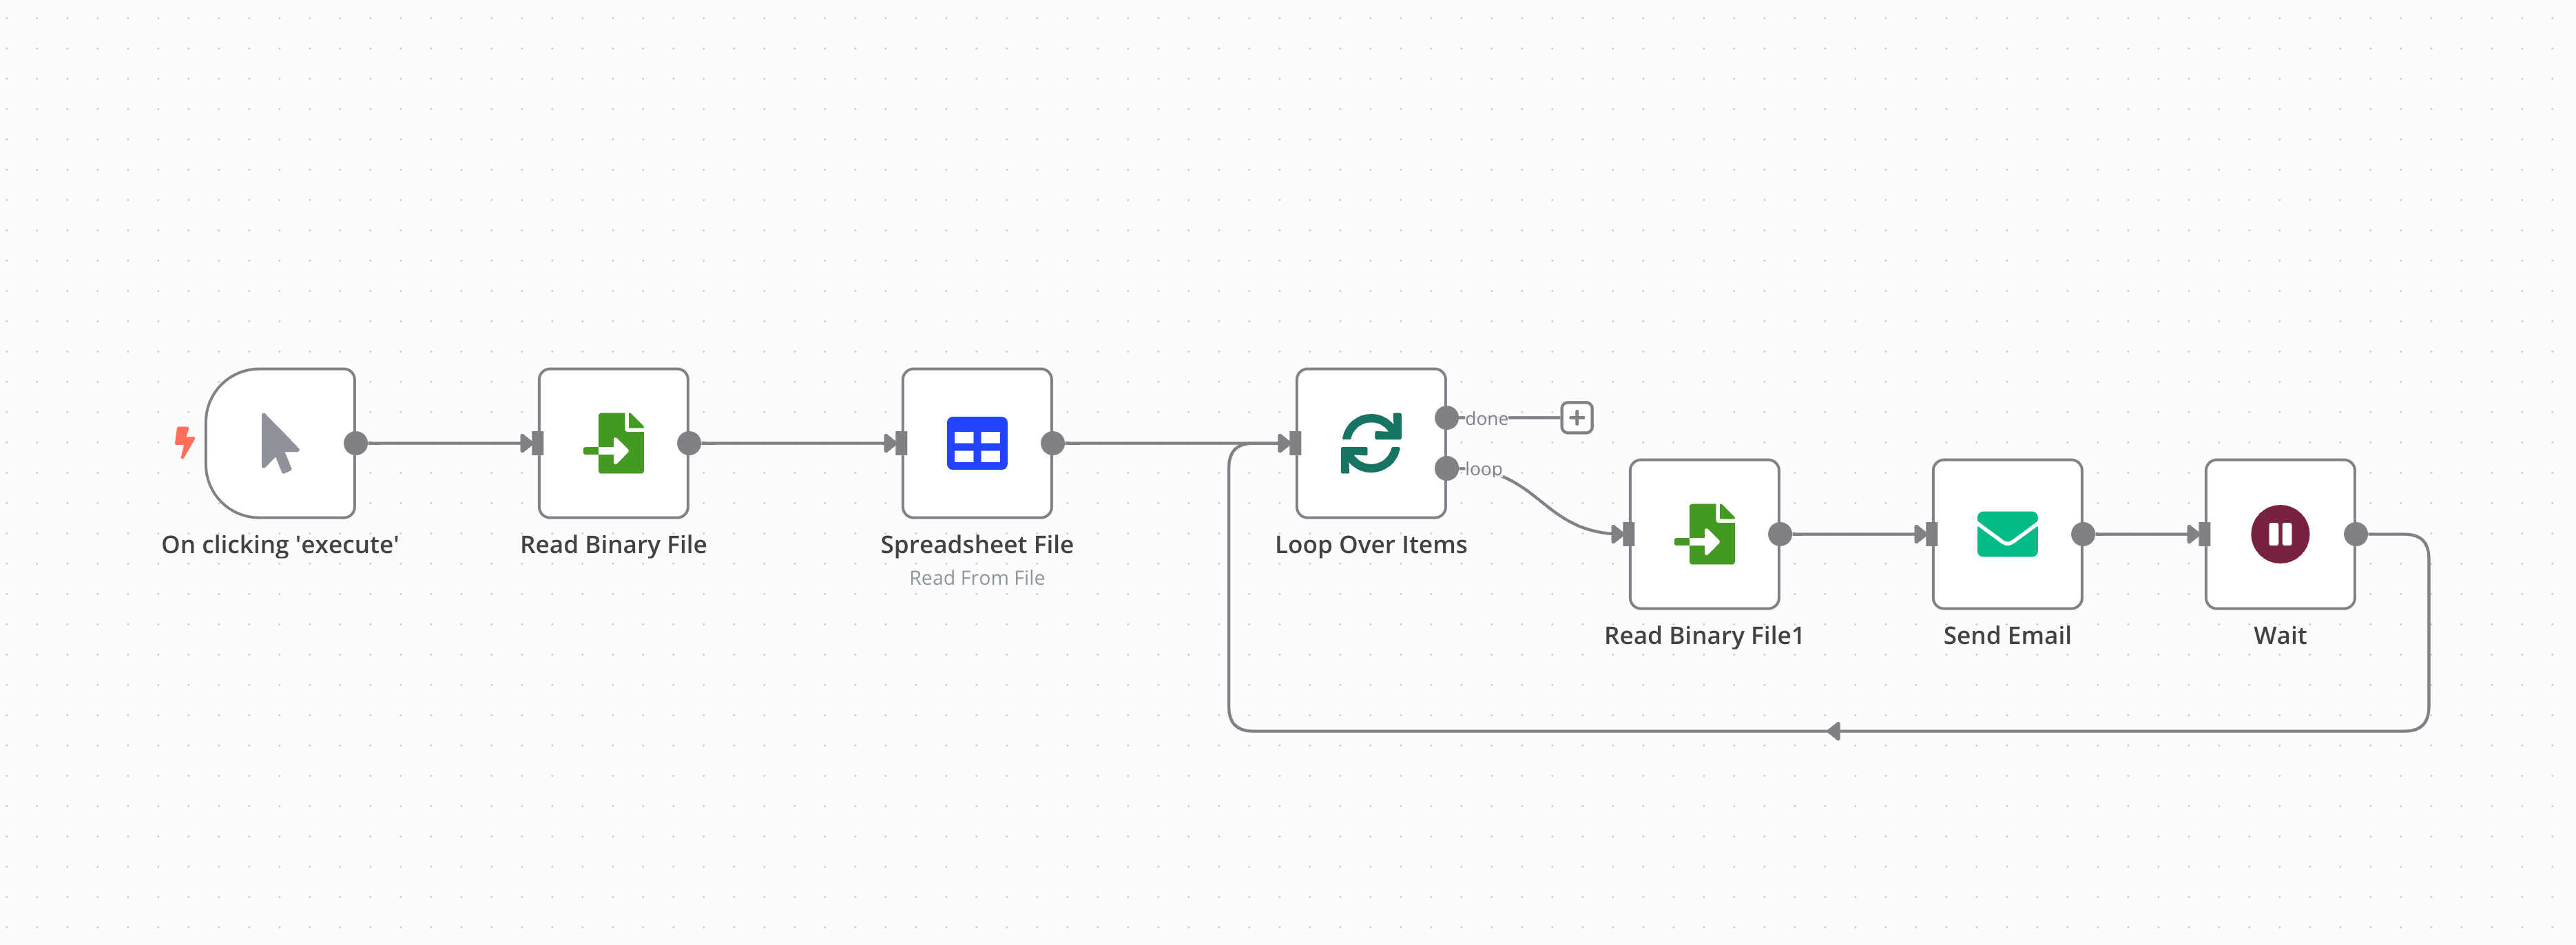
The whole process looks like this. I figured it out after a while. It’s relatively simple.
I strongly recommend not to read the document! Don’t read the document! Don’t read the document!
Because you will want to give up after reading the document…
You can design the process according to your own logic:
First, you need a start node, click start
Then read the excel file
Then split the excel file
Then enter the loop
Then read the attachment file
Then send the email
Then add a delay. I set it to 5 seconds, 12 emails per minute, 17280 emails in 24 hours. This speed is acceptable. If it is too fast, I am worried that the account will be blocked.
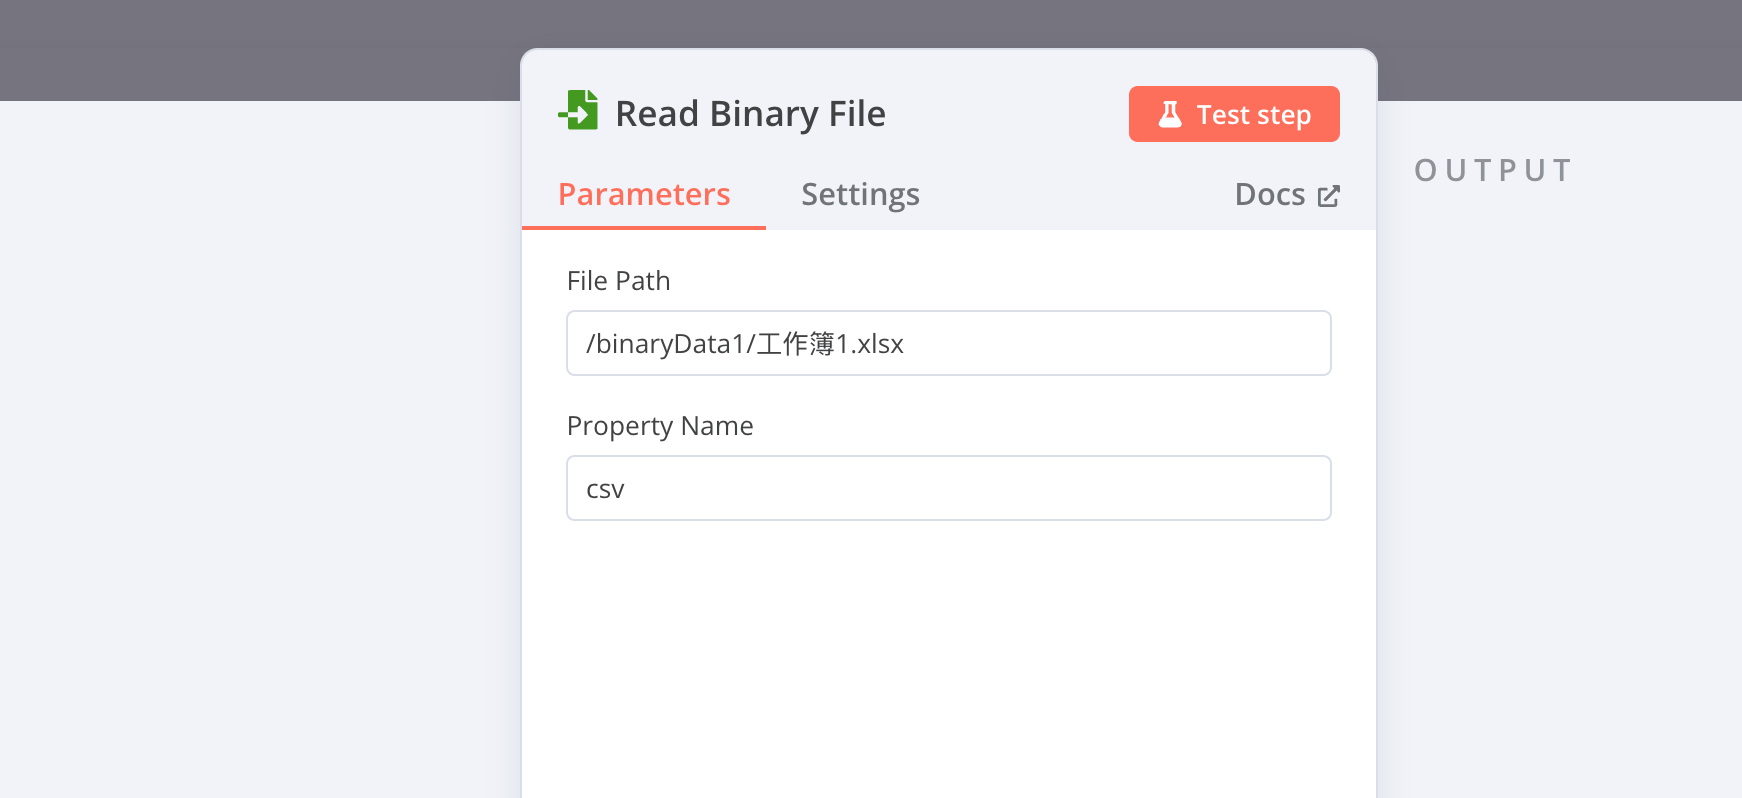
1. Read Binary File node
The left side is input, and the right side is output. What needs to be set here is the File Path. I specifically mapped a location in the environment variable in docker to docker. Therefore, after saving the file in the corresponding location of the host, you can directly read the file in the mapped location of the root directory.
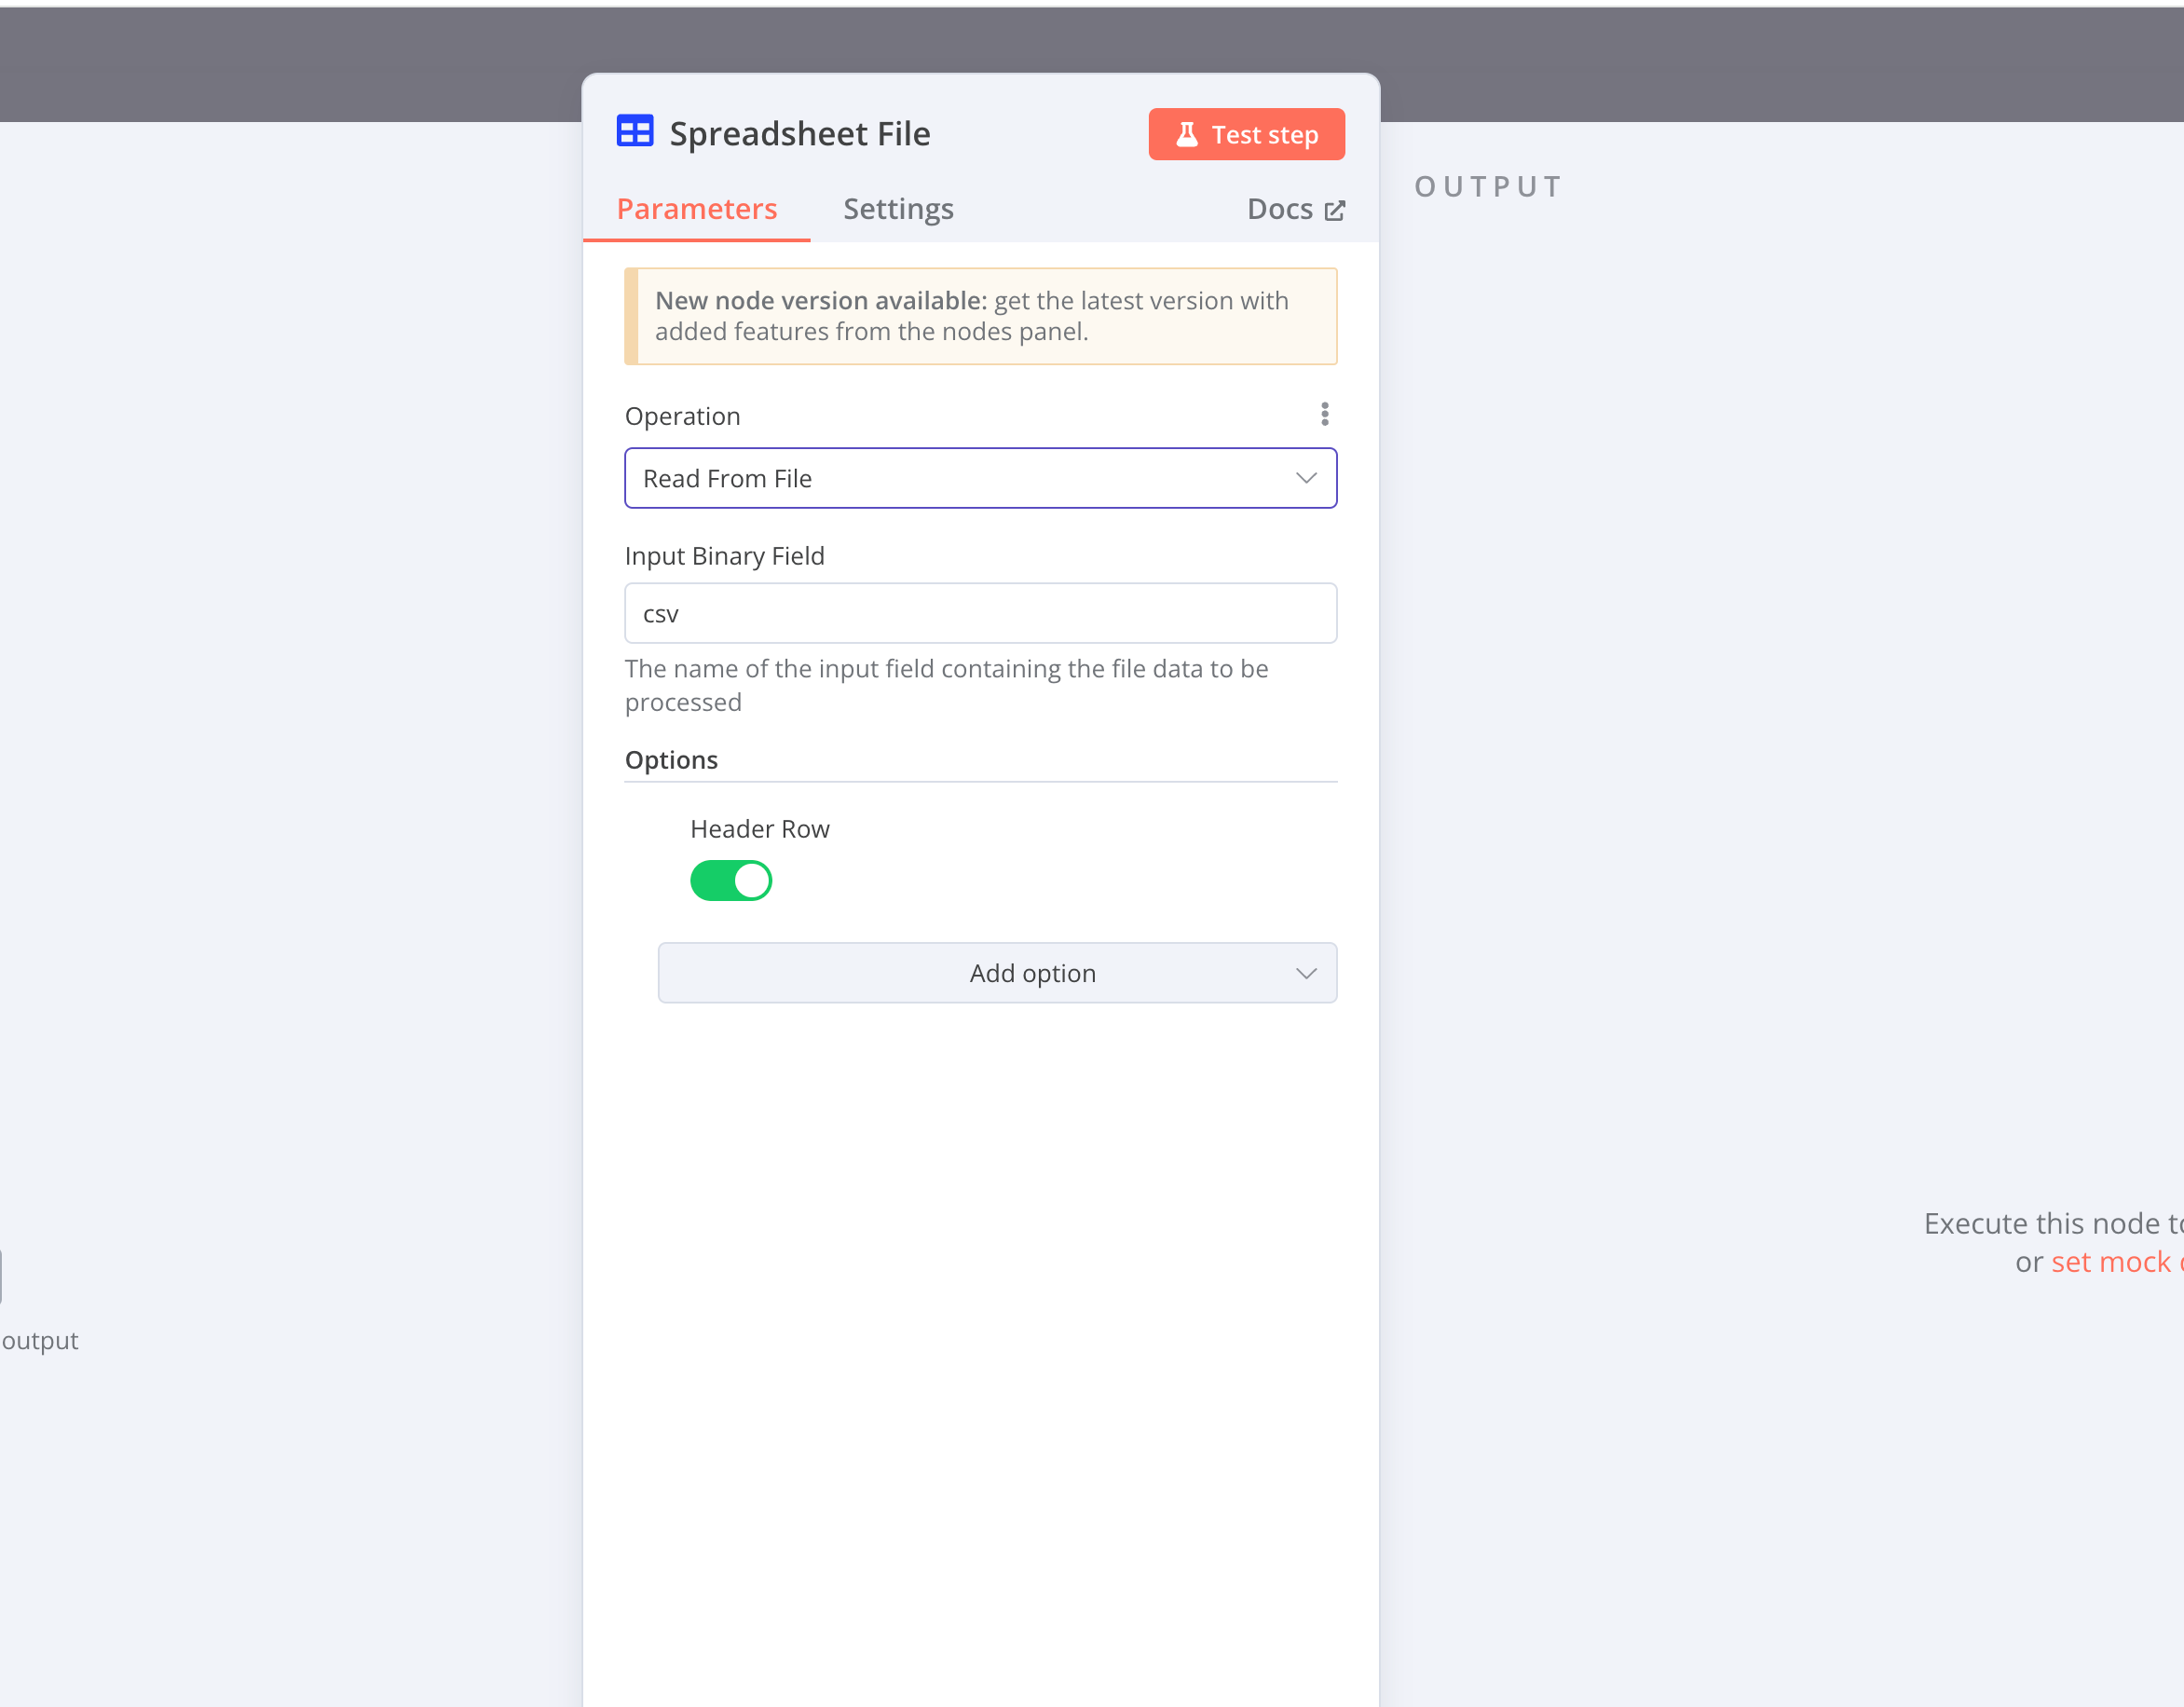
2. Spreadsheet File node
The only thing you need to set here is whether to batch read or batch write. I choose to batch read the Excel file sent from the previous node and then send it to the next node.
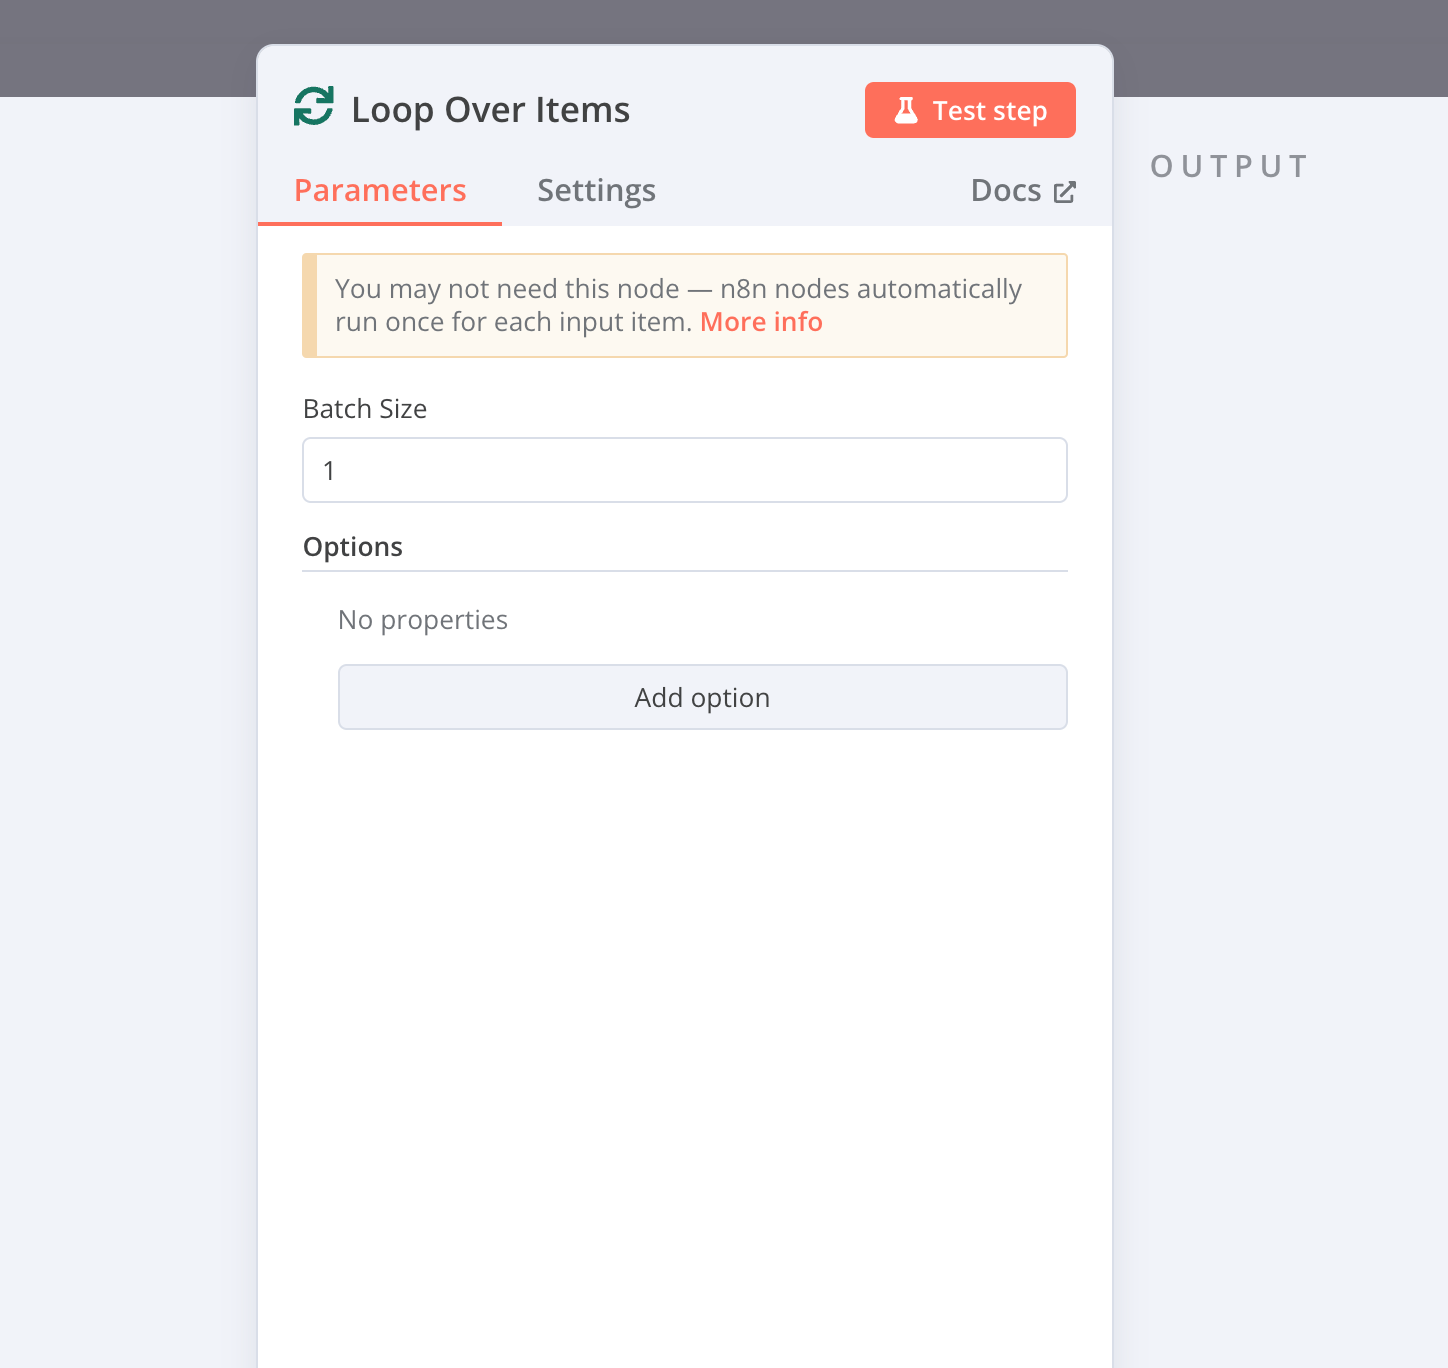
3. Loop Over Items node
Set the number of splits here. We can send them one by one, or 5 at a time. It is safer to set a smaller number.
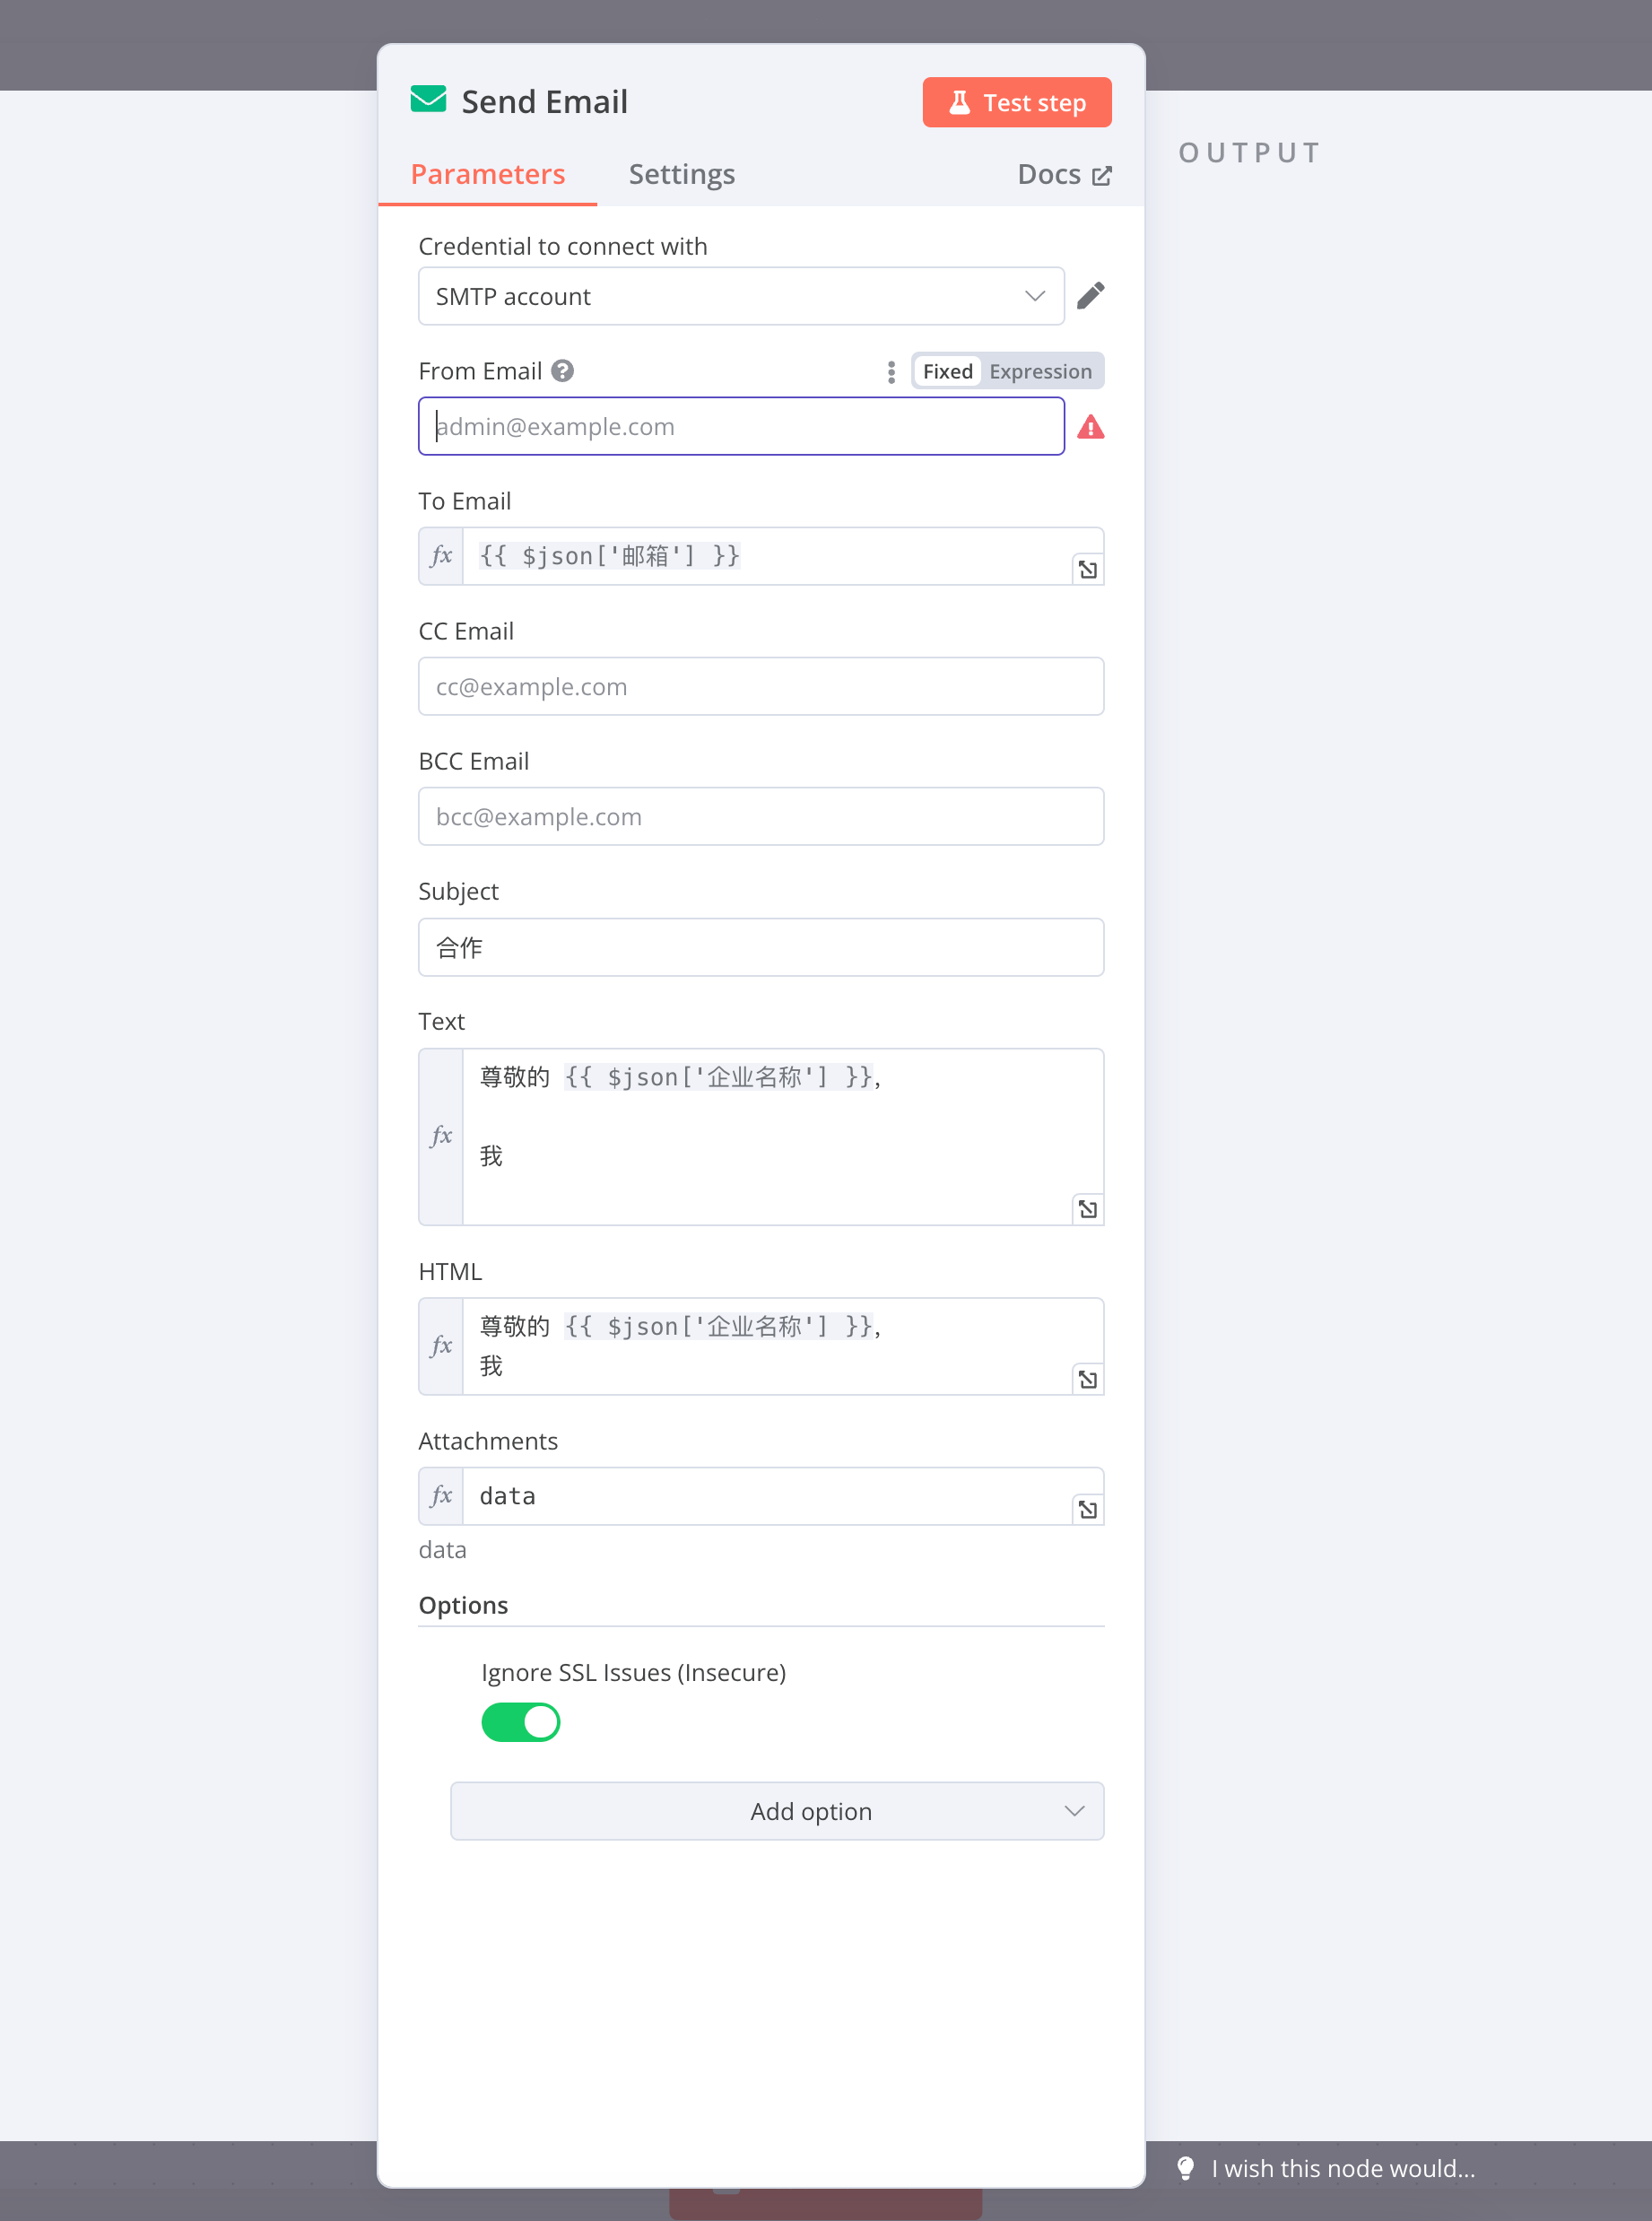
4. Send Email node
There are many things that need to be configured in this node. First, you need to configure the mailbox to enable STMP. I used GMAIL to enable two-step verification and then applied for an application password. You can search for other mailboxes directly or ask ChatGPT.
The sending email is the email address you set, and the receiving email is the email address transferred from the previous Excel. You don’t need to write this yourself. You can directly select the mailbox column in the INPUT on the left and drag it to To Email.
For the attachment part, fill in the name you read the node setting, not your file name. Don’t worry about this. The name will still be your original file name after sending. Here you can understand it as writing this variable in.
Then HTML email, in order to be more secure, because some small company bosses may not use formal emails and may not support HTML emails, so choose both. As for HTML email templates, you can search for HTML template generators on the Internet. I directly asked ChatGPT to write one for me and copied it in.
5. Test the effect
First, send 10 emails to your own mailbox, and it will be successful. Then you can use it officially. Anyway, my NAS is turned on 24 hours a day, so send it slowly