Note
This article was automatically translated using Google
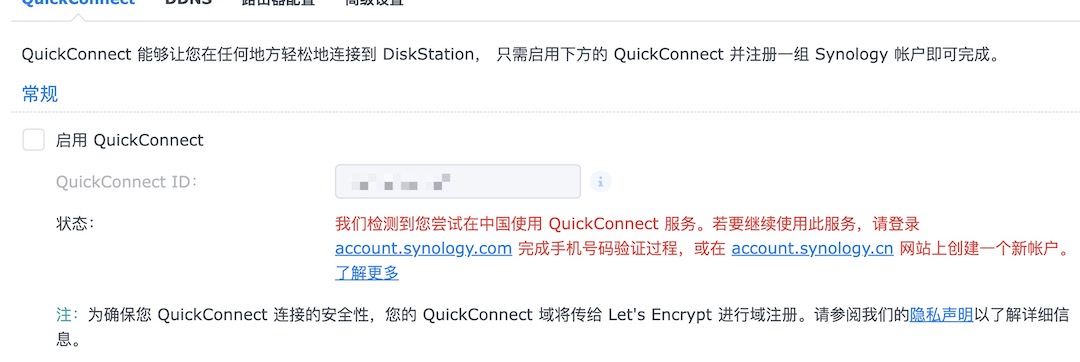
The easiest one is definitely quickconnect, but the account must be migrated to the country, which means that user information, address links, etc. must be stored in the country. I am very disgusted with this point since Apple put the data on the cloud in Guizhou. Therefore, I now use 5G space to synchronize some configuration information on icloud, and put all important files and photos on my nas (this is also the reason why I bought nas in the first place)
Although we are not trying to do anything illegal, but your messing around with my privacy is pure nonsense. There are many ways to prevent Internet fraud, various real-name and various monitoring, and I have not seen much less domestic fraud, so I decisively migrated Delete the device in the domestic account, and then re-register an account, ready to do external network access by yourself
After logging in to the new account, you will find that there is a prompt in quickconnect suggesting that you migrate, hehe, give them a smile and experience it for yourself
Get ipv6 address
Well, let’s get far, the premise of doing ddns is that you have an external network IP. Of course, at least Beijing has not allocated it to individuals, but it costs 100 yuan a month to open a value-added service, and you can share one, which is pure nonsense. What should have been given to me in the first place, made up a bunch of reasons not to give it, and then opened an opening to collect money. This is a typical robber’s thinking.
But fortunately, there are plenty of ipv6 addresses. At least Beijing should have all allocated them. First, change the optical modem to bridge connection (I rooted and changed it by myself four or five years ago. You may need to search for the tutorial), and then Enter the router and turn on ipv6, select Native mode, and select automatic configuration for ipv6 dns, Also remember to turn off the ipv6 firewall
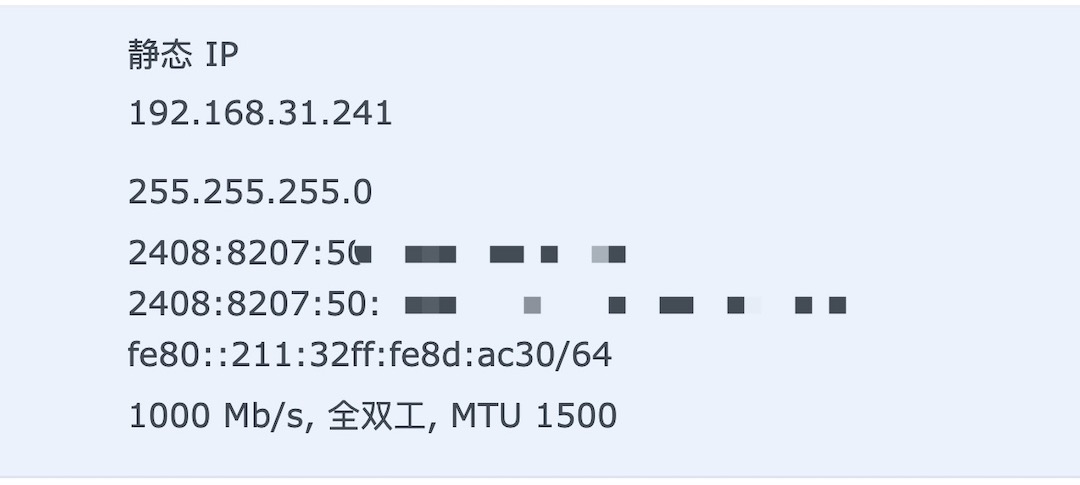
After confirmation, you can see in the group that you have obtained the ipv6 address starting with 2408. At the same time, all the devices under your router should be able to obtain the ipv6 address.
DNS
Compared with people who play nas, they already have their own domain names. The easiest registration is Ali and Tencent, a one-stop service, registration plus analysis. But in fact, you can transfer the domain name to other platforms to manage and resolve it. I have been using freedns. The interface is simple but extremely reliable. The most important thing is to configure ddns extremely simple
Let me say one more thing here, in order to monitor all kinds of monsters, a group of idiots used to give China the authority to issue ssl certificates, but they made it up by themselves. The reason is that they hijacked dns with fake certificates and were discovered. It’s so ridiculous. , so if you go to all government websites now, you will find that their certificates are all issued by the United States, hahahahaha! !
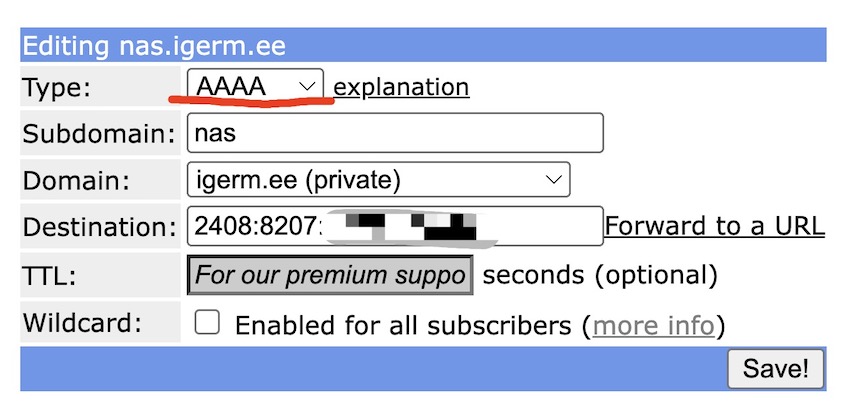
First do a domain name analysis, choose AAAA to analyze the ipv6 address and save it
Then click Dynamic DNS on the left to enter the configuration page, and click the dynamic update interface above
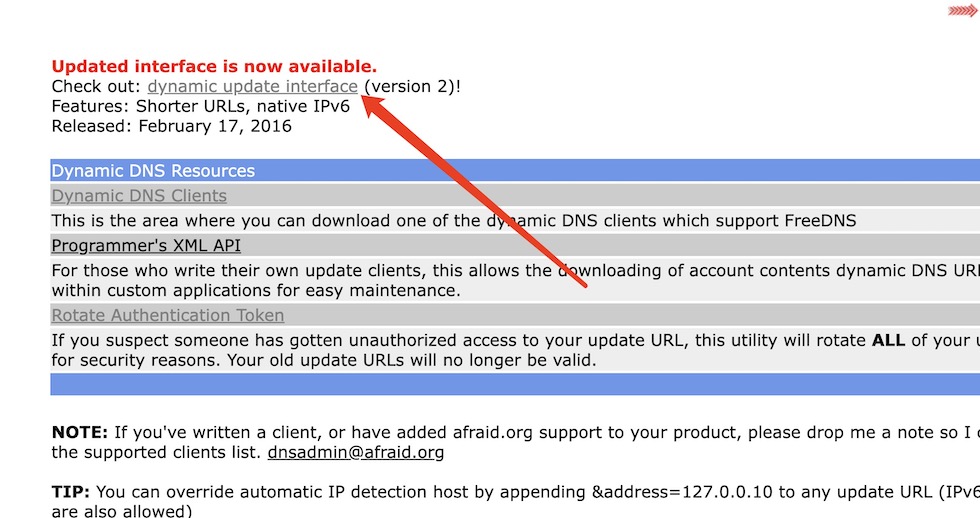
Then you can choose the domain name to enable DDNS, activate it, and an upload link with a dynamic password will appear later, just copy it.

Automatically upload new addresses
If you are also using freedns, the good news is that you don’t need to use the ddns that comes with Synology (because you can’t upload ipv6 addresses in it), and you don’t need to use the famous ddns-go, you just need to open the text editor and write A shell file:
1 | #!/bin/bash |
It’s as simple as that, after curl is the upload address you just copied
Then save it as a .sh file (remember the utf-8 encoding), and put it in any path of Synology
Enter the control panel, pull down to the bottom and there is a scheduled task. The name and scheduled time are in front of it. I chose to execute it every 10 minutes from 0:00 to 11:50 every day. Run the command here and directly bash the script you just saved. The location is enough
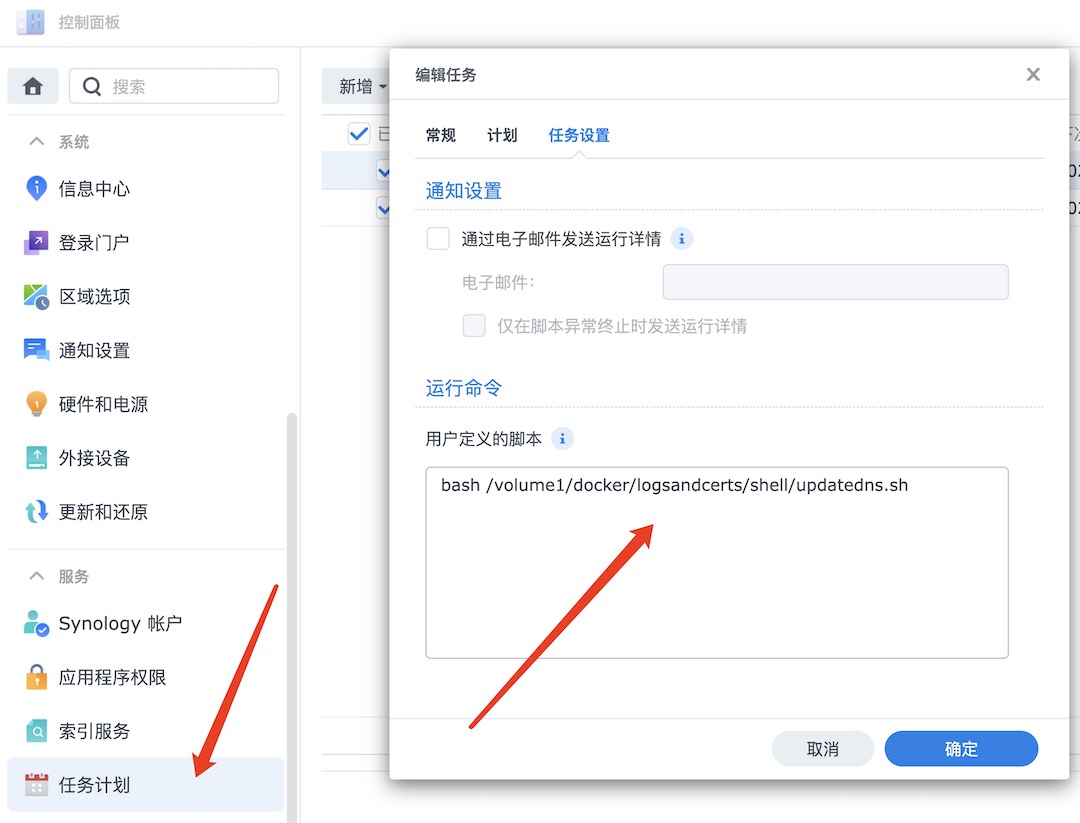
Later, you can open a task execution log, but you can open this kind of thing to take a look, so just close it, there are quite a lot of log files once every ten minutes.
Apply for an SSL certificate
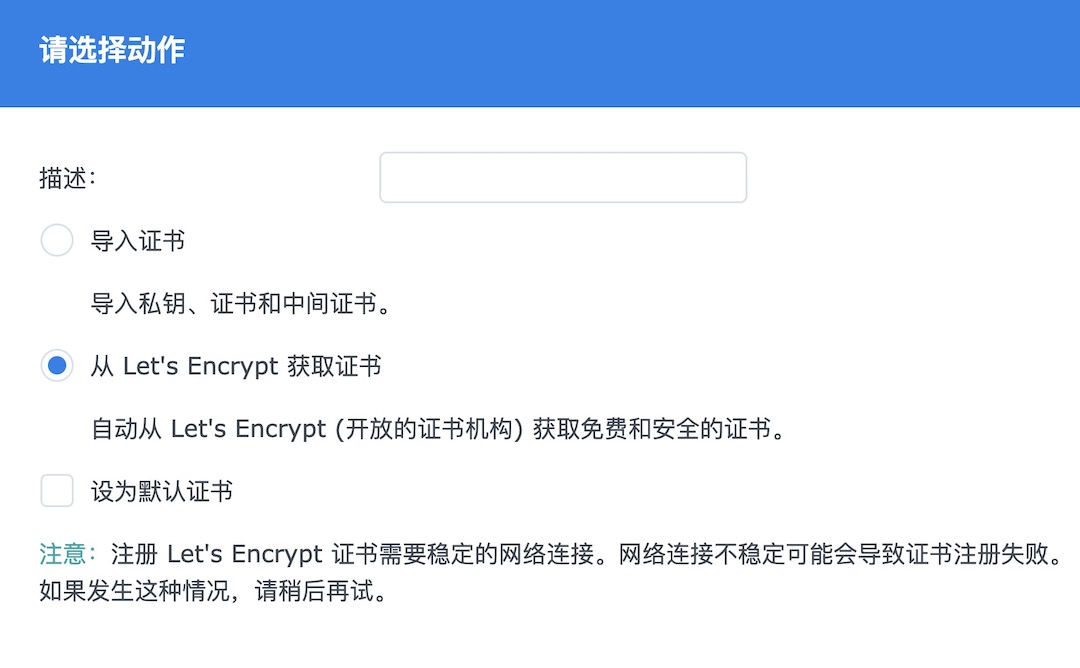
You don’t need to go to other places to apply. The certificate application tool that comes with Synology can apply for the free certificate of Let’s Encrypt. You can add it in the control panel-security-certificate. After the application is complete, set the certificate as the default certificate and enter Settings, re-select all the certificates inside, and now you can use https://custom domain name to access your group on the external network
Use certificates for applications in Docker
With the certificate, there are actually two ways to enable https support for applications in docker:
Import certificates for different applications and open them in their own way;
Use the reverse proxy server that comes with Synology
It is strongly recommended to use a reverse proxy here. You don’t need to build an nginx yourself, because the reverse proxy server version 7.0 is really easy to use
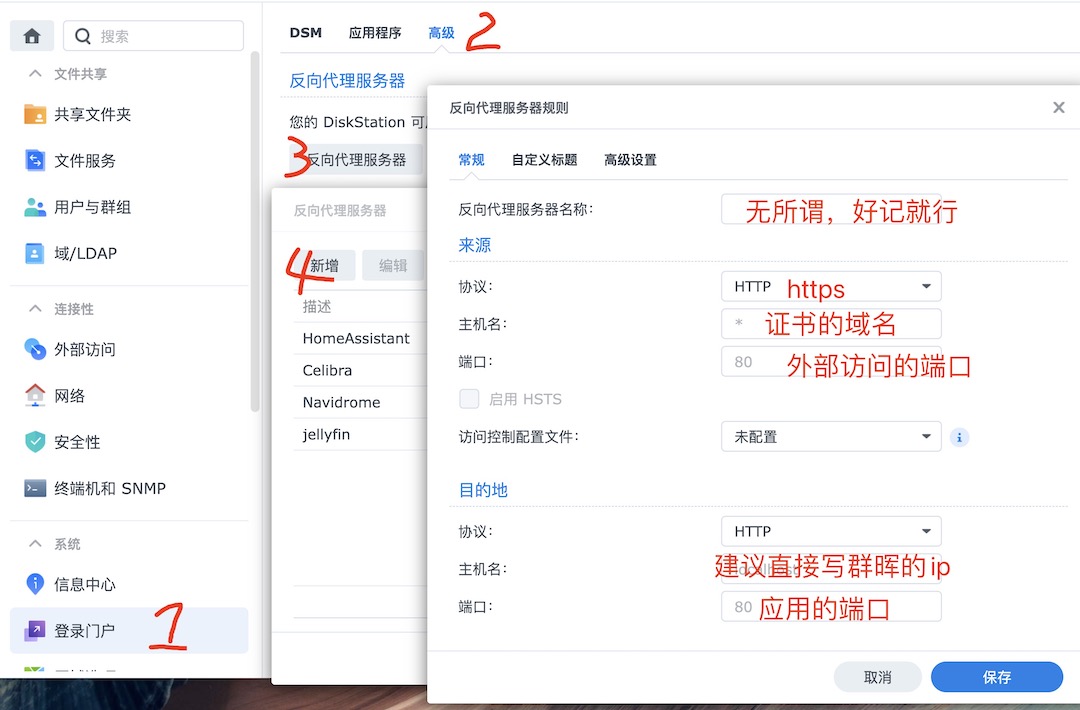
Directly in the control panel - login portal - advanced - reverse proxy server - add, and then fill in the application that needs to be reverse proxy. There is a great advantage of using the built-in reverse proxy server here, no need Then deal with the certificate, after the selection is completed, Synology will automatically load the certificate
Then add a WebSocket in the custom title and save it directly
Special formulation of Home Assistant
When configuring the reverse proxy in the latest version of Home Assistant, for security needs, you must add an authorization information in the configuration.yaml file, and add the intranet IP of Synology, otherwise the reverse proxy will fail
1 | use_x_forwarded_for: true |
Notice
After all, the ipv6 firewall of the router is turned off, so it is recommended to enable two-factor authentication. Download a SynologySecure Signin on the mobile phone. No more re-entering tokens
Then set the original port of the application in the firewall so that only the fixed ip of Synology can be accessed, which is a little more secure (it’s not a big problem, it’s mainly anti-scanning, and it’s definitely risky to throw it on the public network. I did everything, it doesn’t matter)
